|
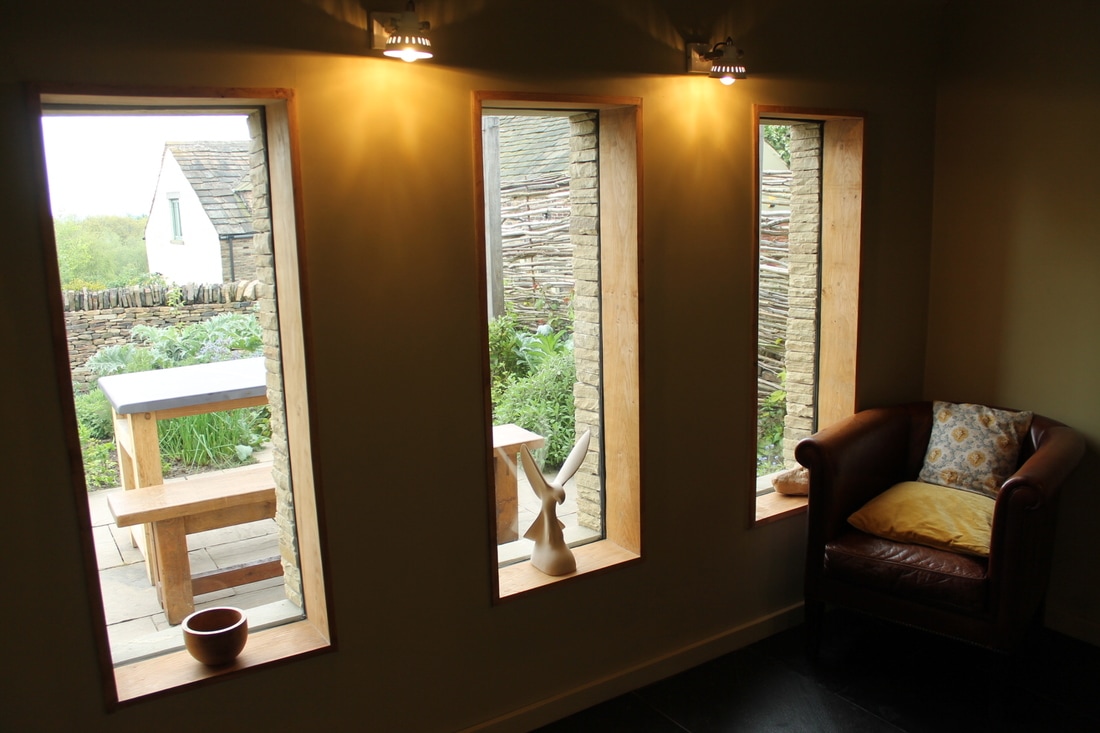
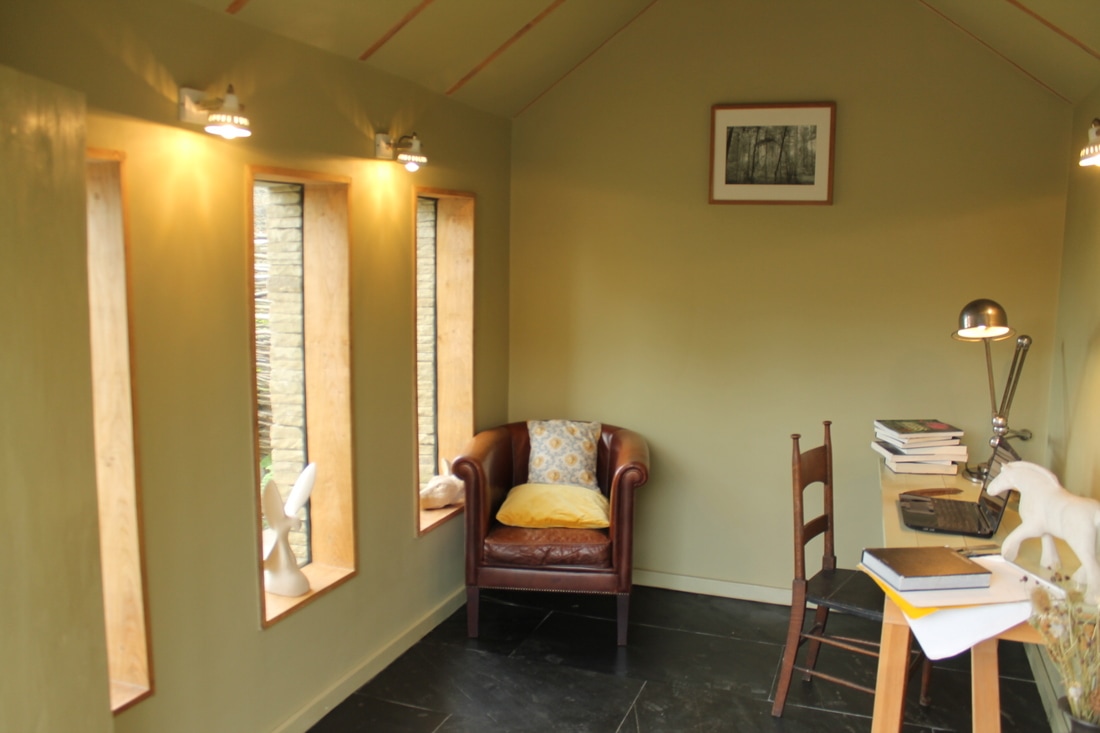
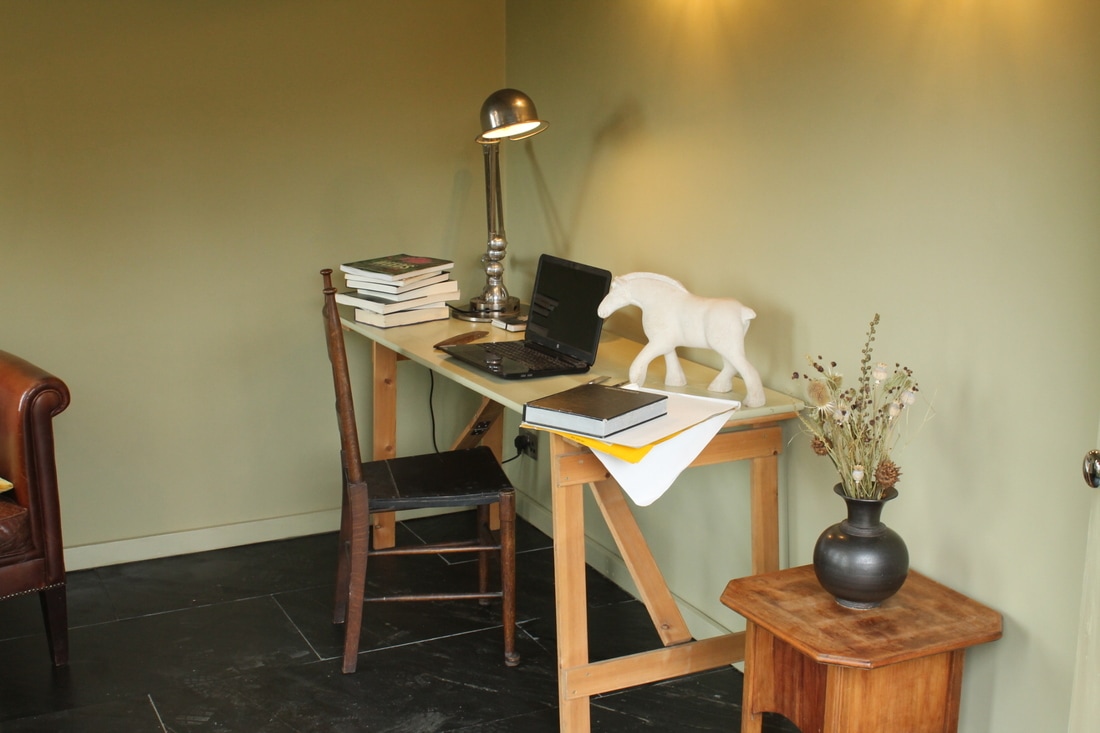
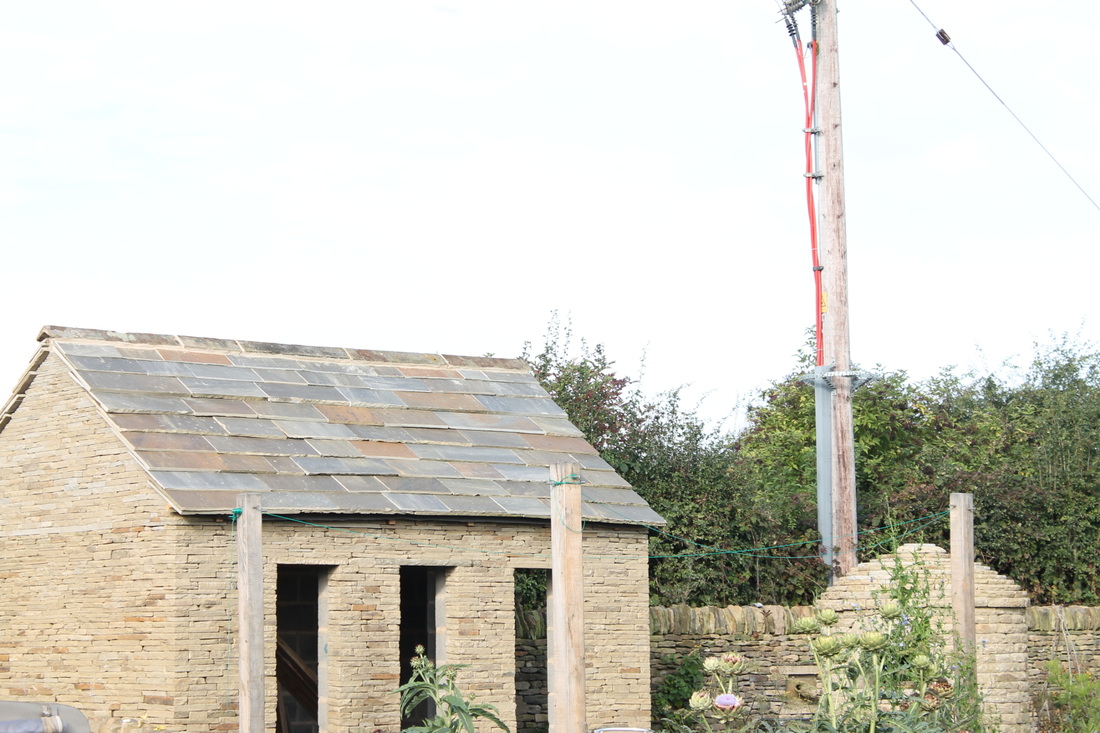
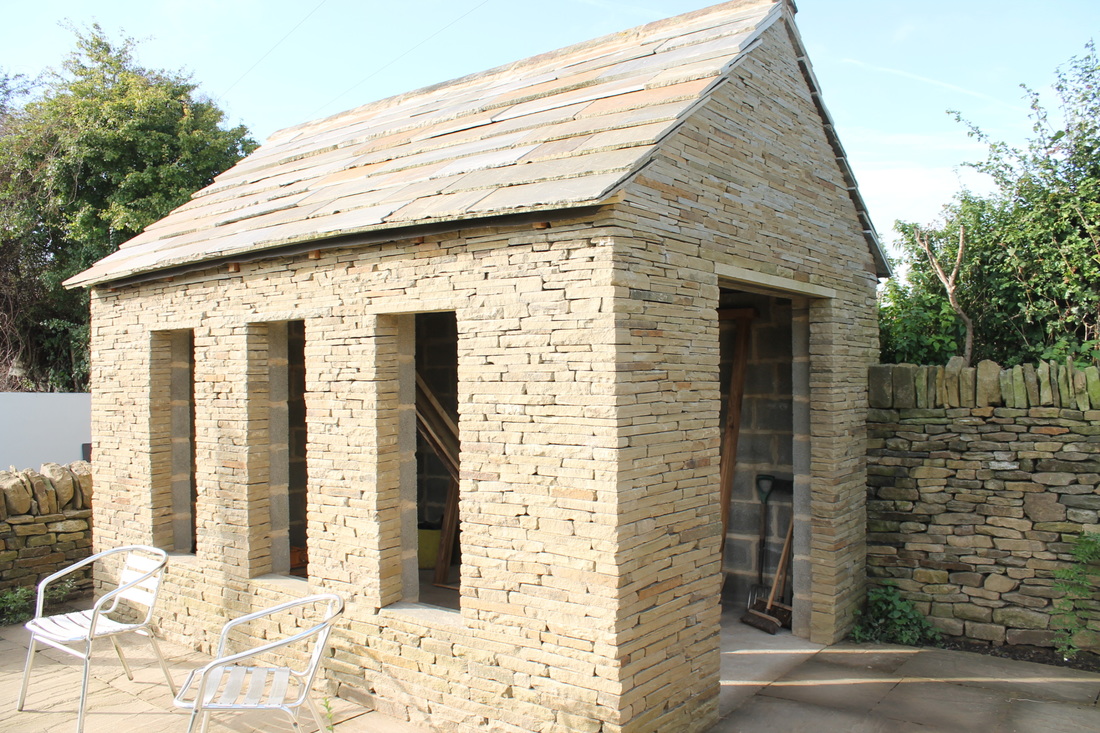
We finished the exterior of a stone clad summer house some time ago. We wanted the stonework of the building to be very tight and to not show any gaps or mortar and so we selected a flat bedded Yorkshire sandstone. The three main windows were designed to let in natural light and to allude to Georgian symmetry. We also built the cabin with a large double doors that could be left open on a summers day. The attention then turned to the interior which had to be wired, fitted, plastered and painted. The result is a relaxed creative office space that can double as a garden living room. The floor is two-inch thick Cornish slate, which lends a vintage look combined with the large local oak beams and window frames. We painted the interior with a shade of London Plane green which is perfect for a garden space. 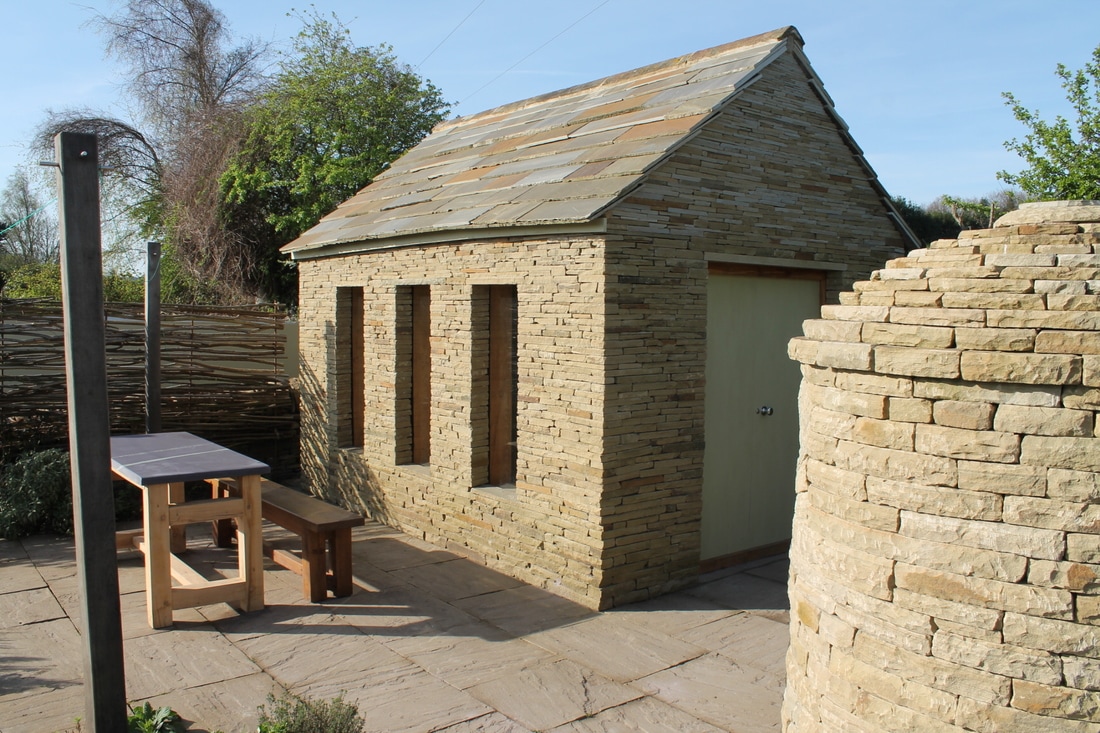
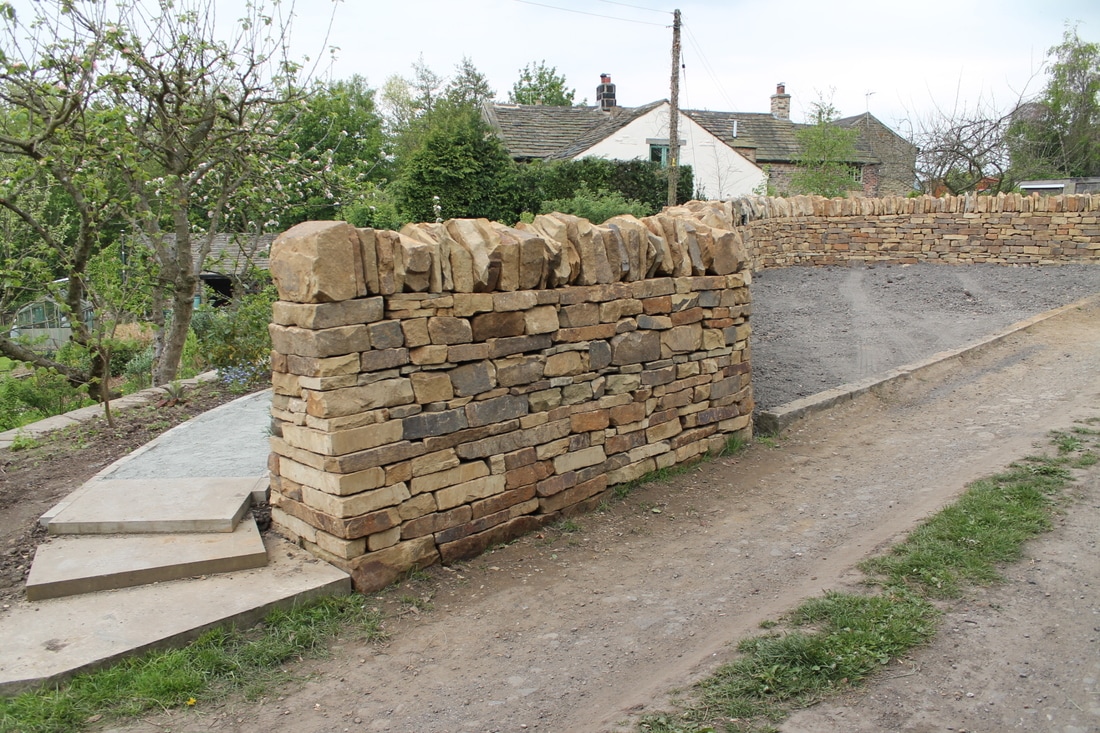
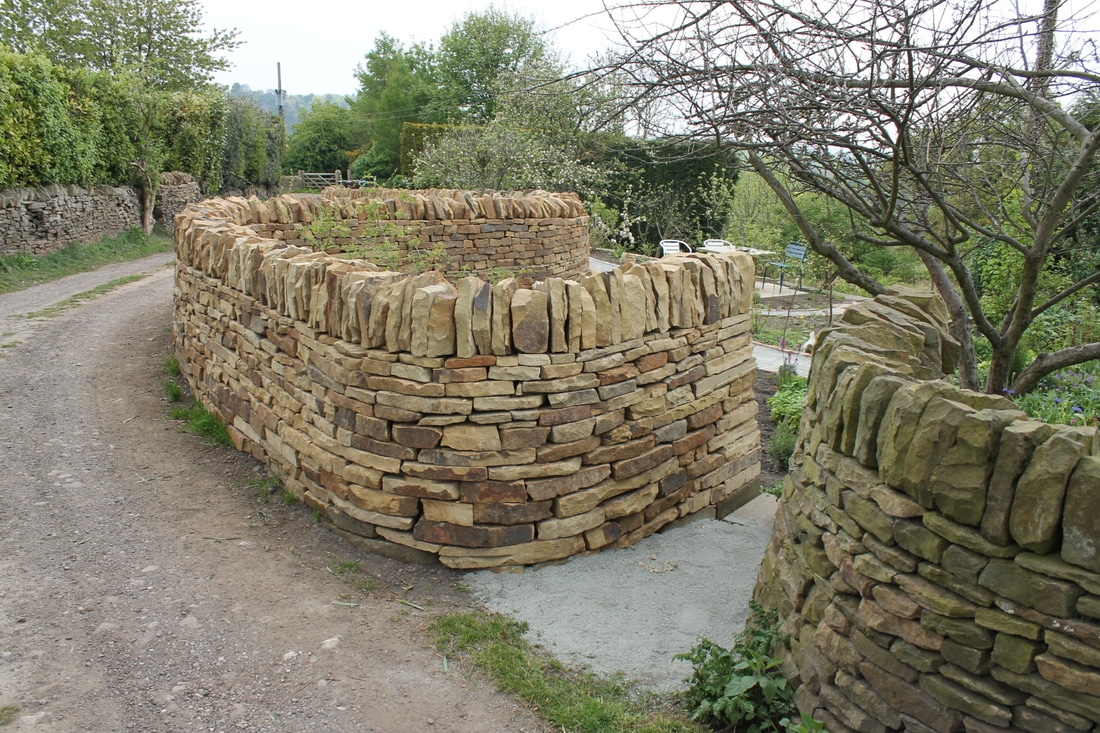
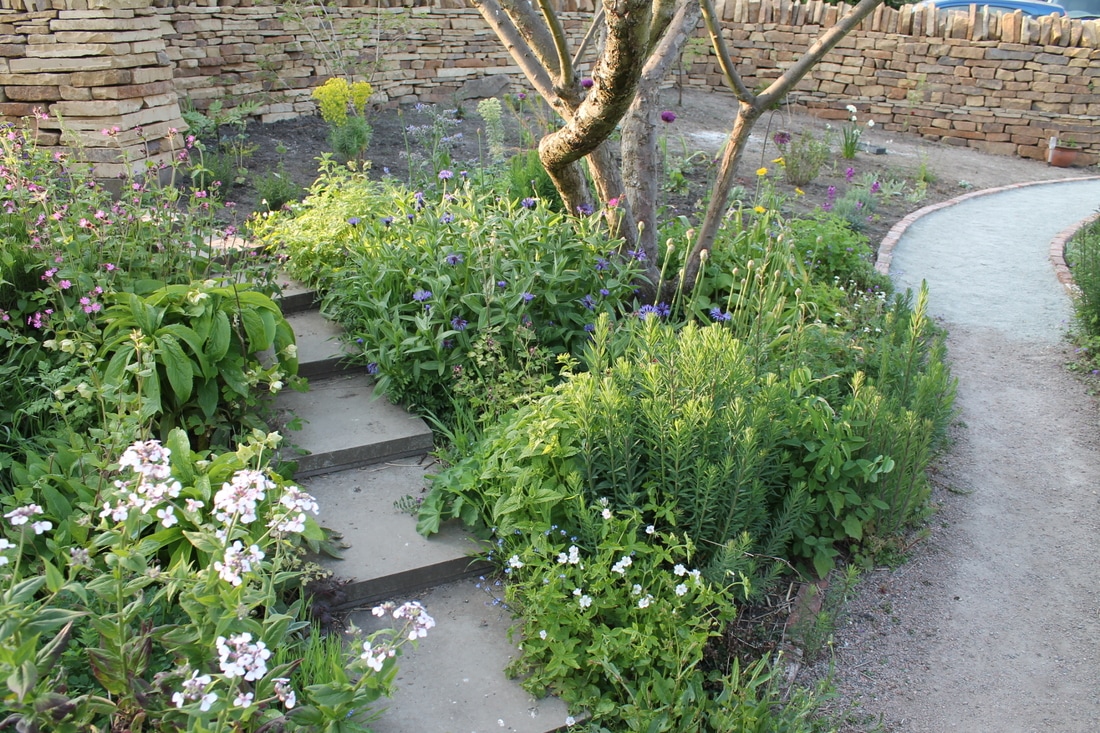
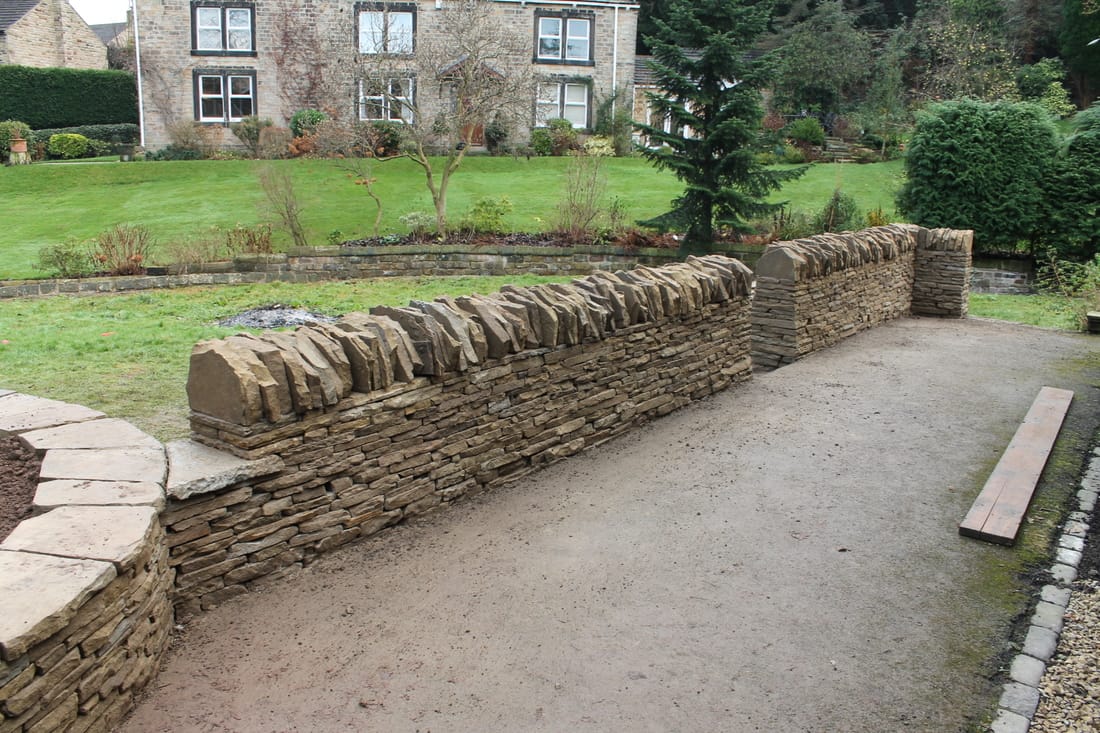
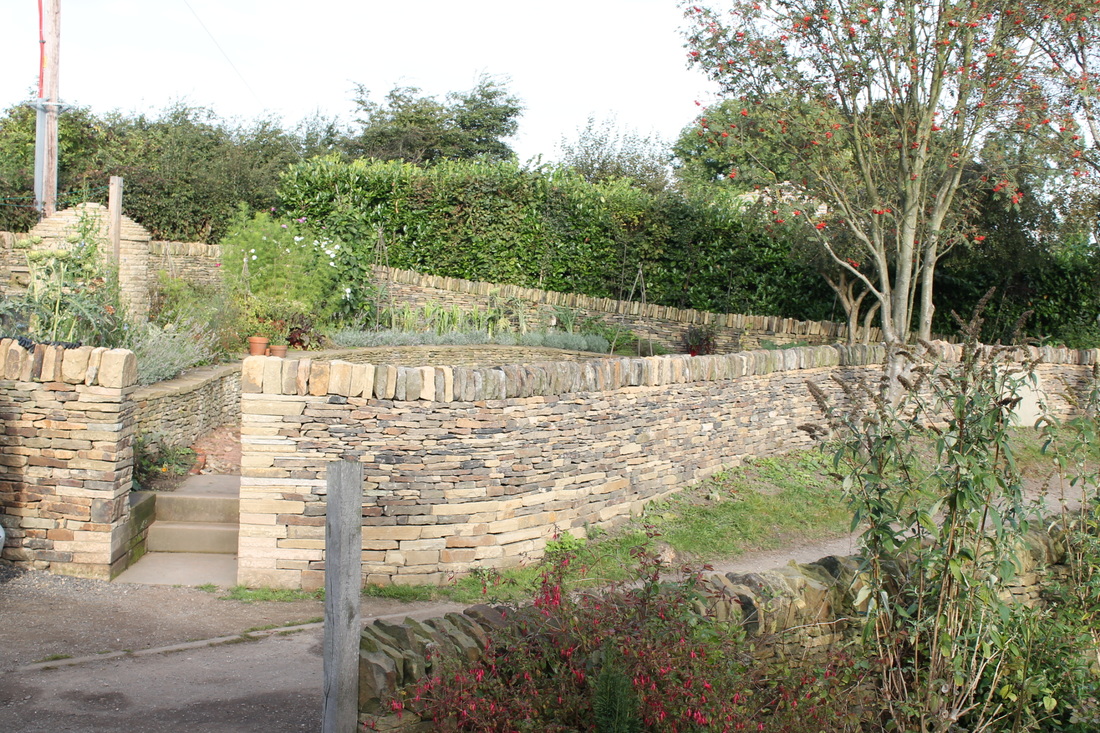
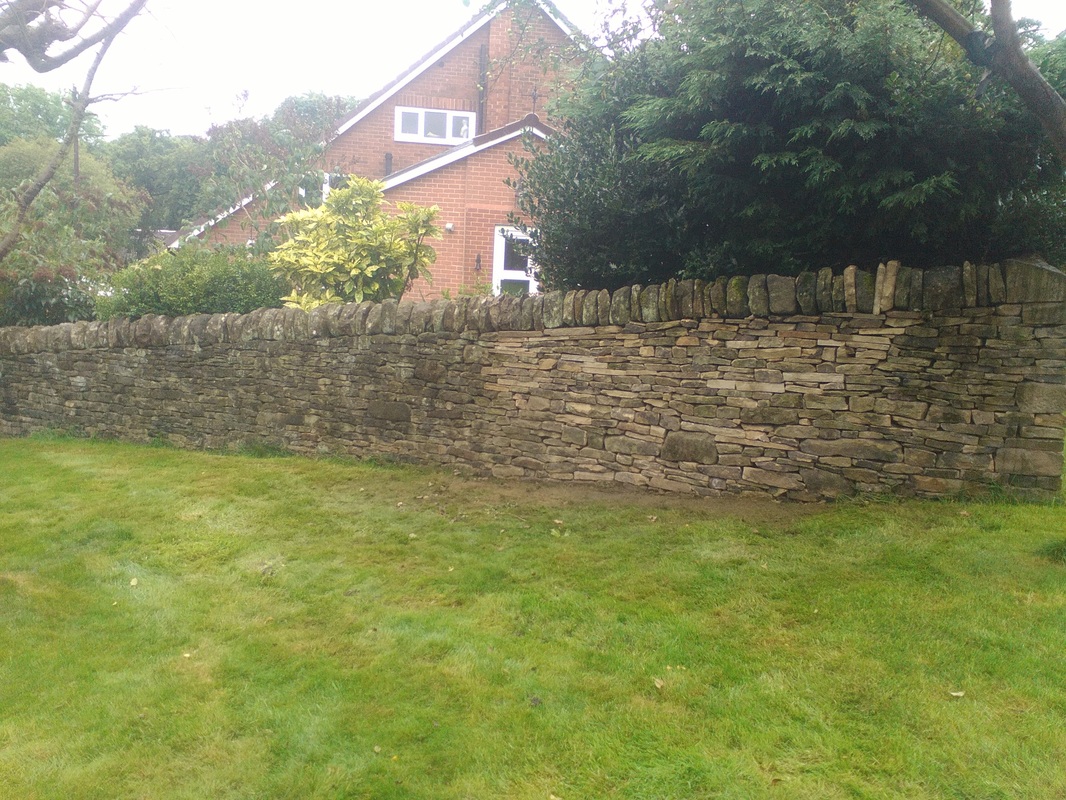
 We have finished the tall dry stone wall that separates a large car parking area from a curving terrace garden with a central path. The wall is above 6 foot in places and provides a pleasant screen from the vehicles when sat in the garden. The path leads through two beds on either side and leads to a stone patio seating area that is raised up by the terrace wall and provides striking views down the valley.
Another entrance on the other side of the parking bay is created by two curving wall ends that create an artistically symmetrical gateway that leads to a gradually declining stone staircase surrounded by alliums and hellebores.
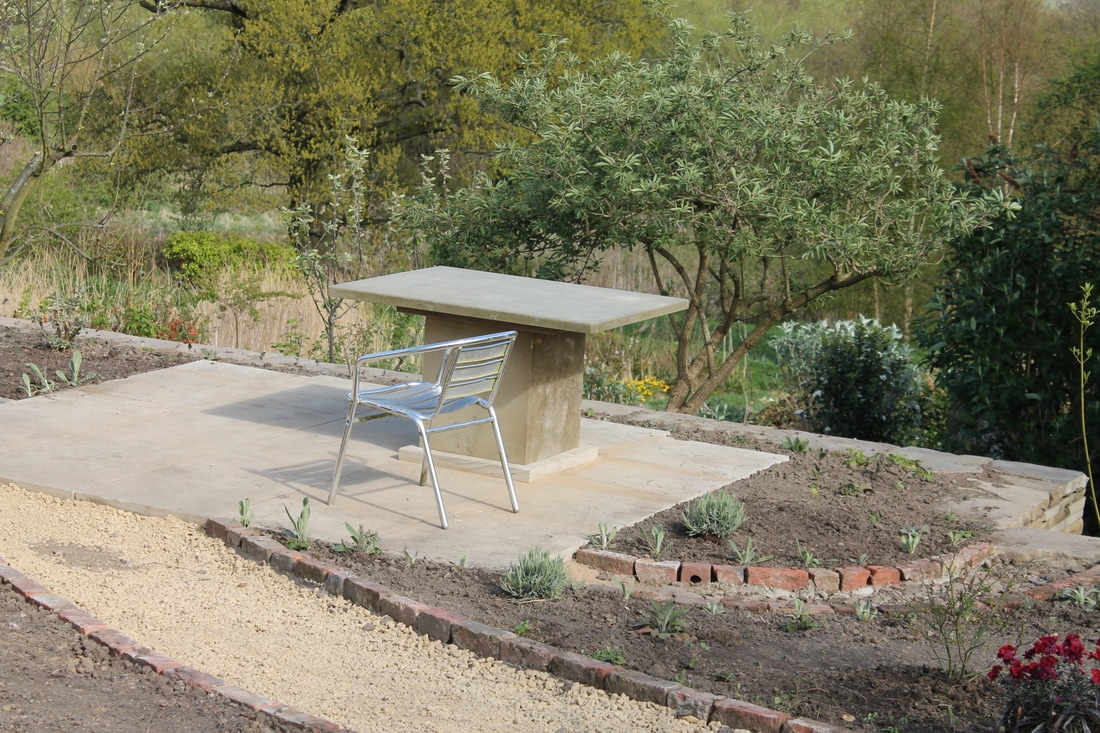
On a sandstone patio we erected a large stone block that supports a beautiful Forest of Dean stone slab which makes a fantastic seating area to sit and look at the view on a sunny day.
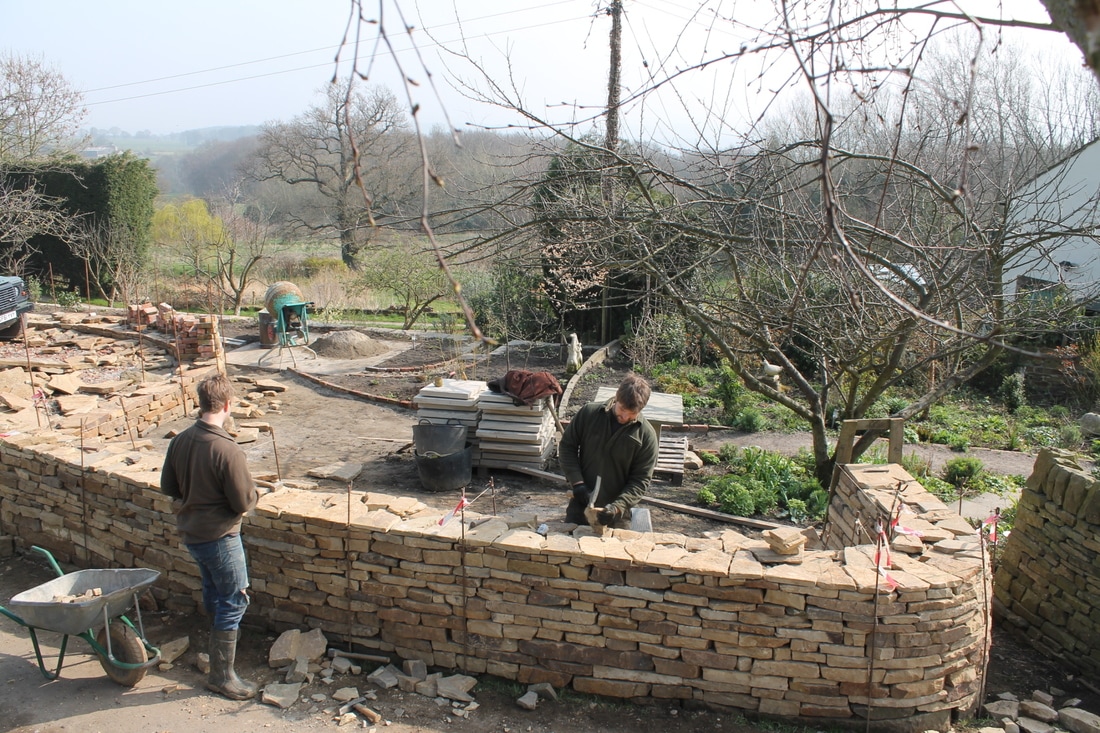
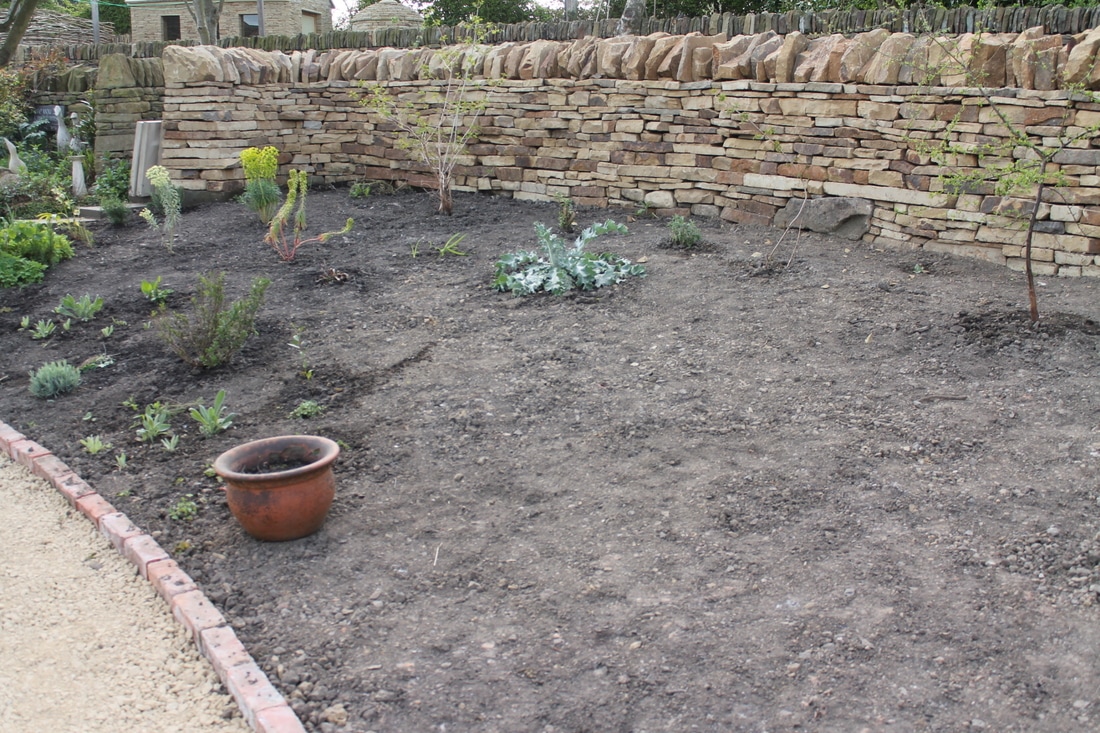
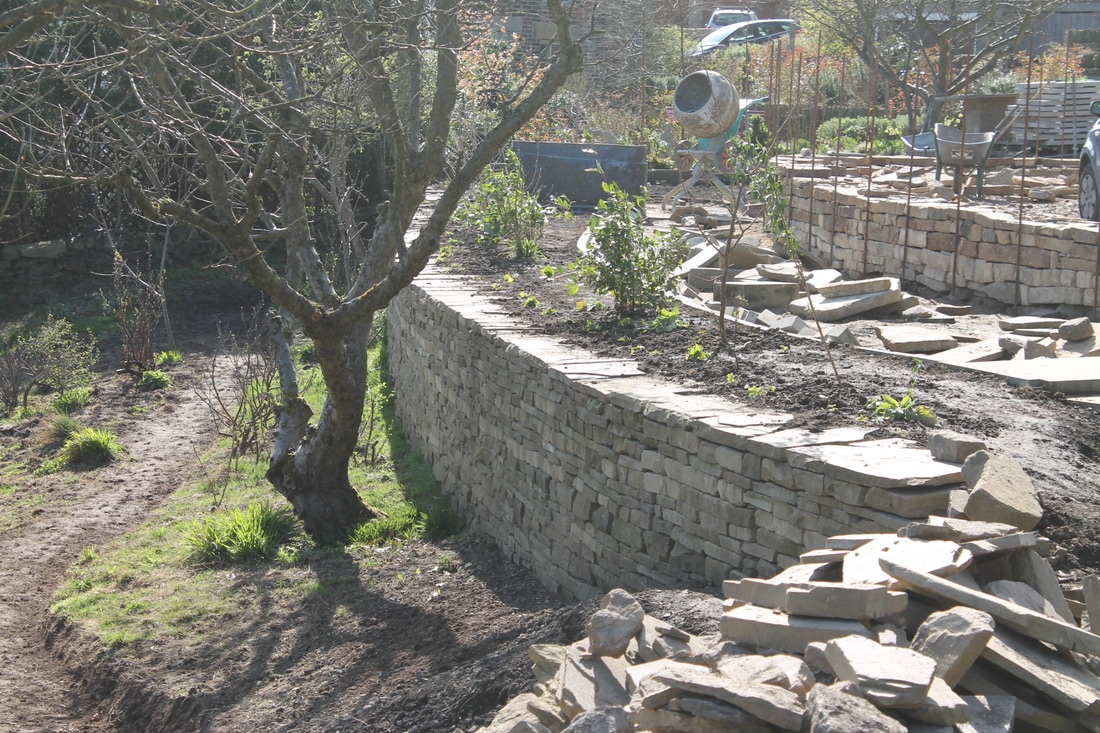
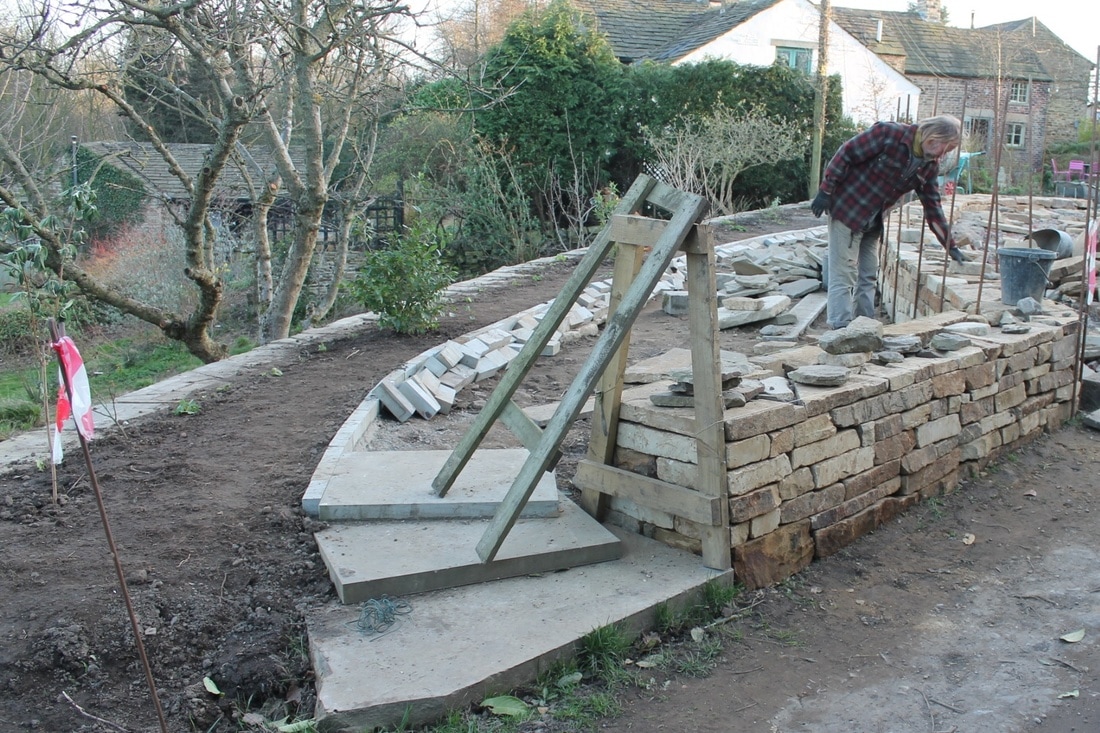
We have been continuing to work on the area of garden reclaimed from thin air by the large terrace wall and lots of soil infill. We got 20 tonnes of soil from a different quarry in West Yorkshire that we liked the look of. We built a curving boundary dry stone wall that defines a large sloping soil bed that we raked out and have begun planting up with trees and shrubs. In this area we have also created paths lined with sawn sandstone blocks leading to a small sandstone patio with an interesting block stone altar table. Here is the wall underway: The wall has opened up a large sloping bed that had quite a bit of top soil brought in from elsewhere to bolster the fertility. The small trees that have been planted towards the wall are a prunus spinosa and a viburnum opulus. We also put in a few different varieties of euphorbia, which makes for a more interesting planting. Everything just needs a lot of watering and some time to grow!
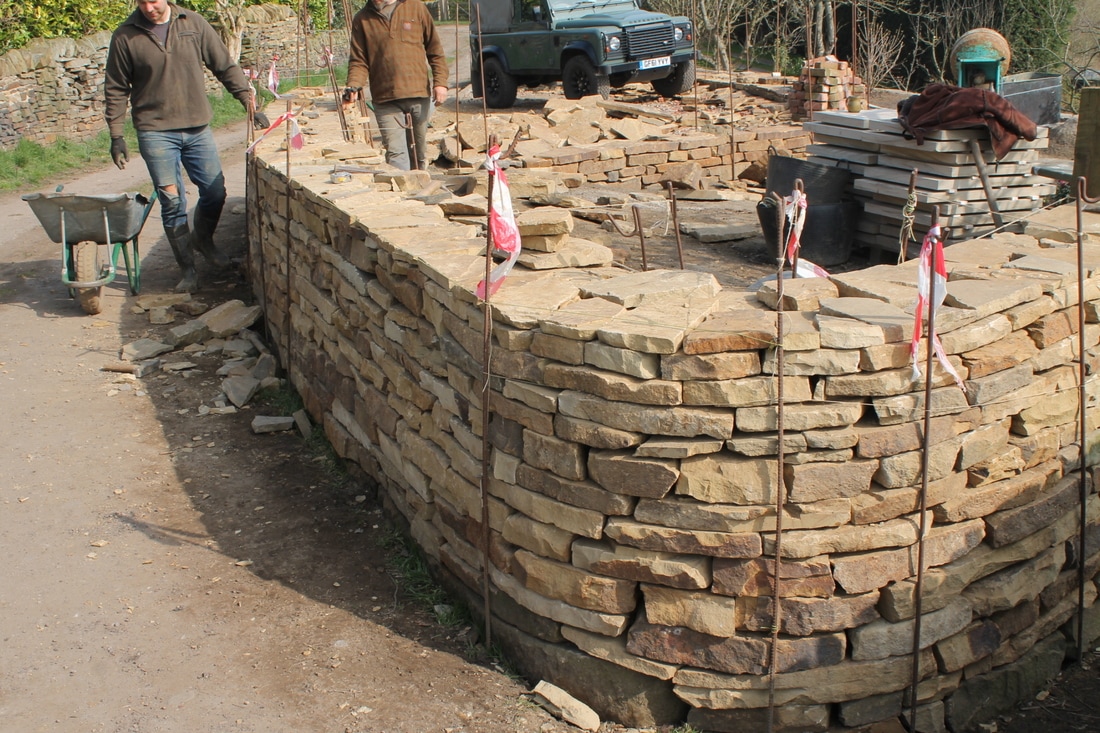
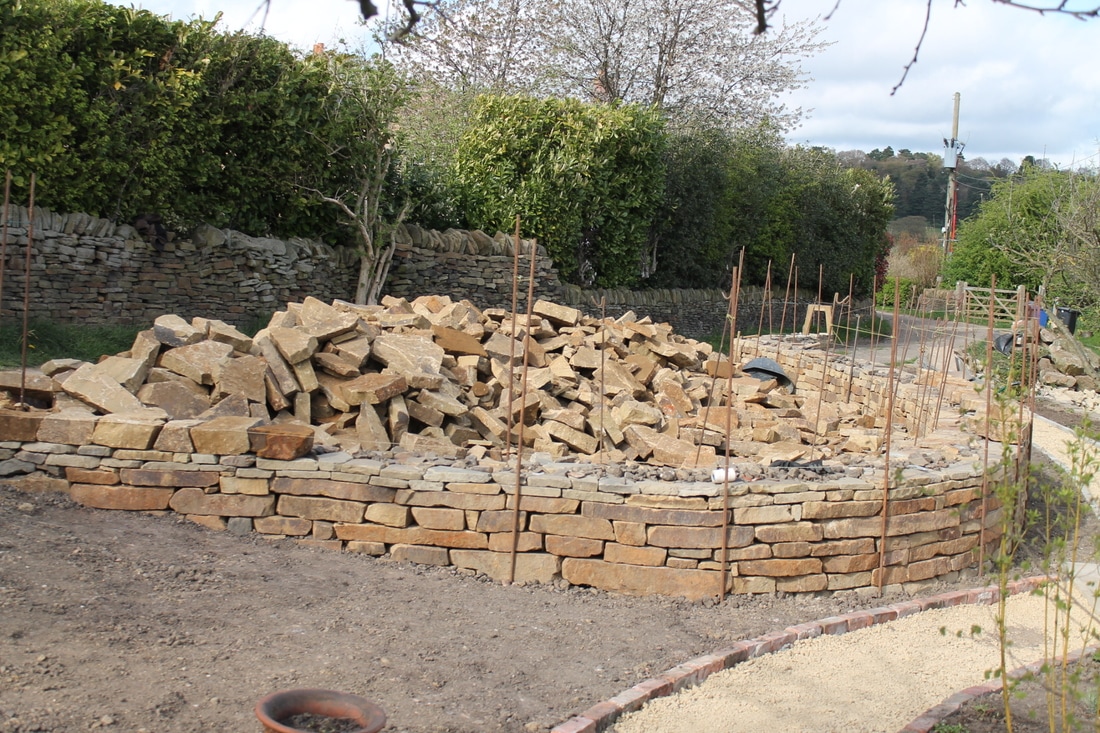
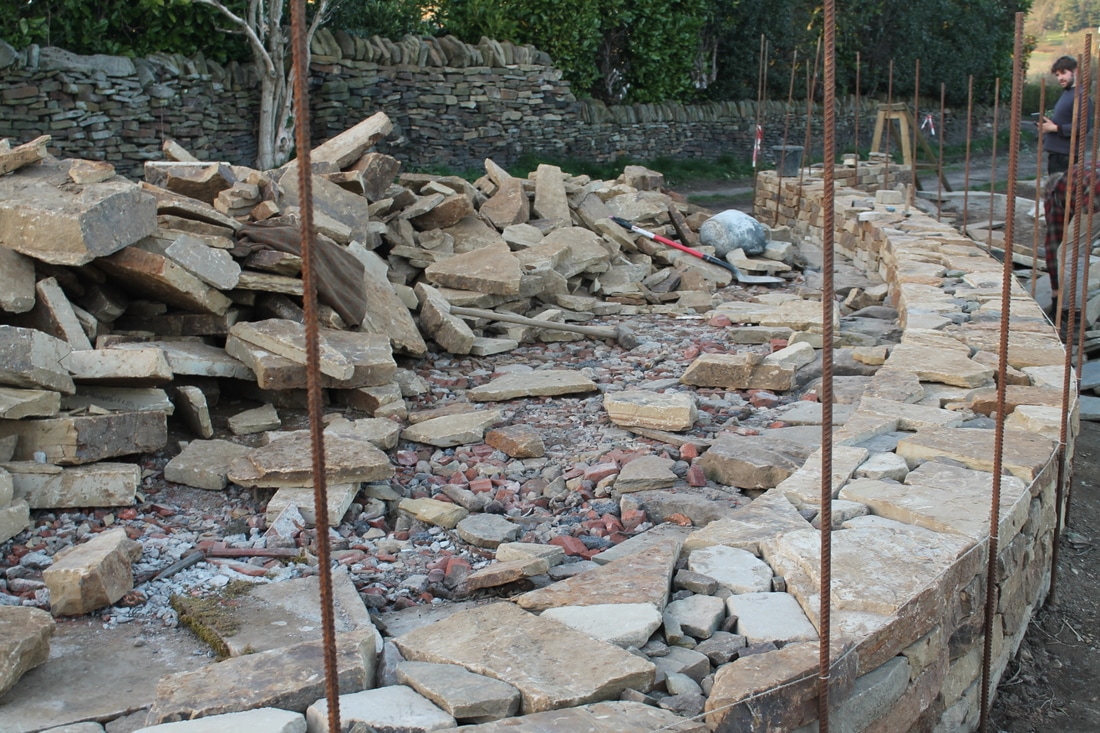
Below the wall, the path sweeps round to the sandstone patio and large block table that we have built. The table and patio are on the edge of the terrace but puts the sitter at the height of the sambucus growing on the other side. When it's in blossom this is a nice time to sit and reflect. 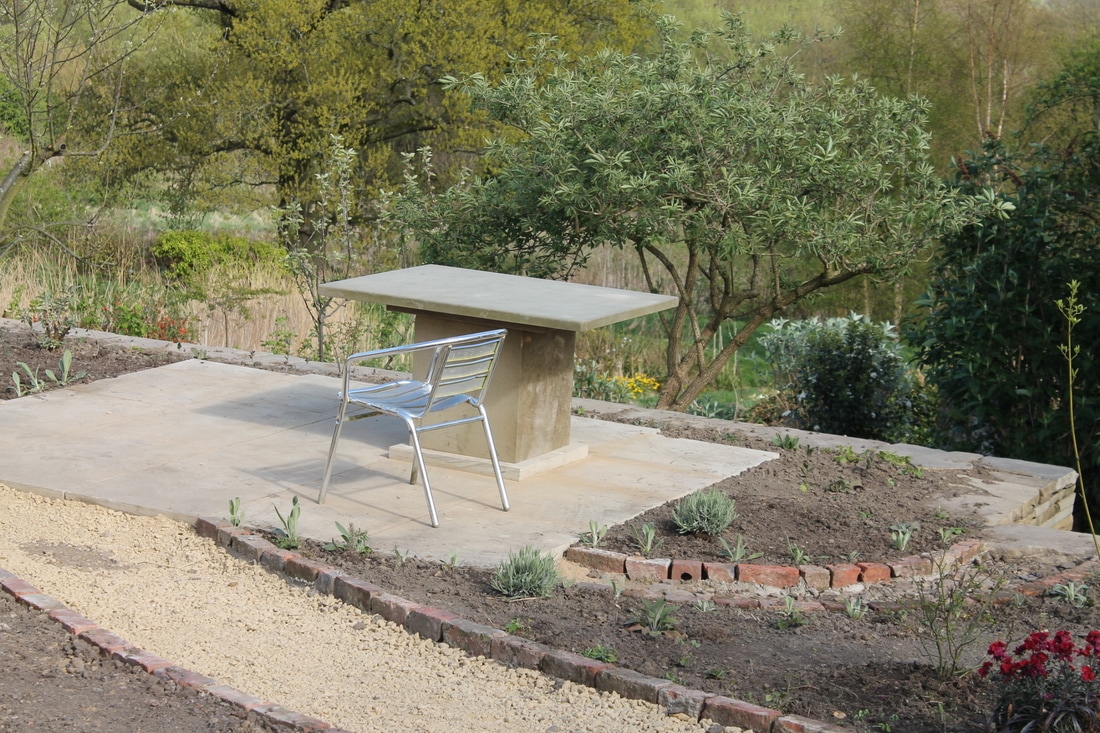 The wall continues and tightly curves to form a large ovular car parking space. This has to be a large substantial wall with large foundations, which is still underway. We have just had another 20 tonnes of stone delivered from West Yorkshire and it looks like quite a pile, but a long and tall wall like this is very hungry for stone so it will all disappear into the wall in due course.
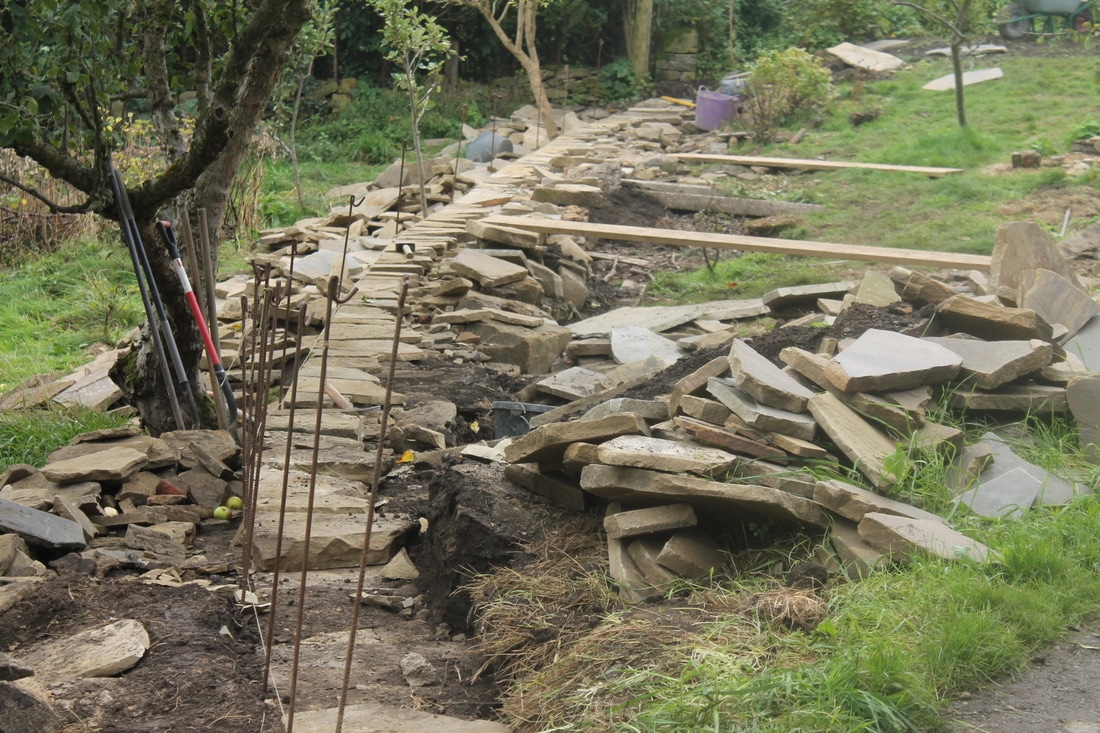
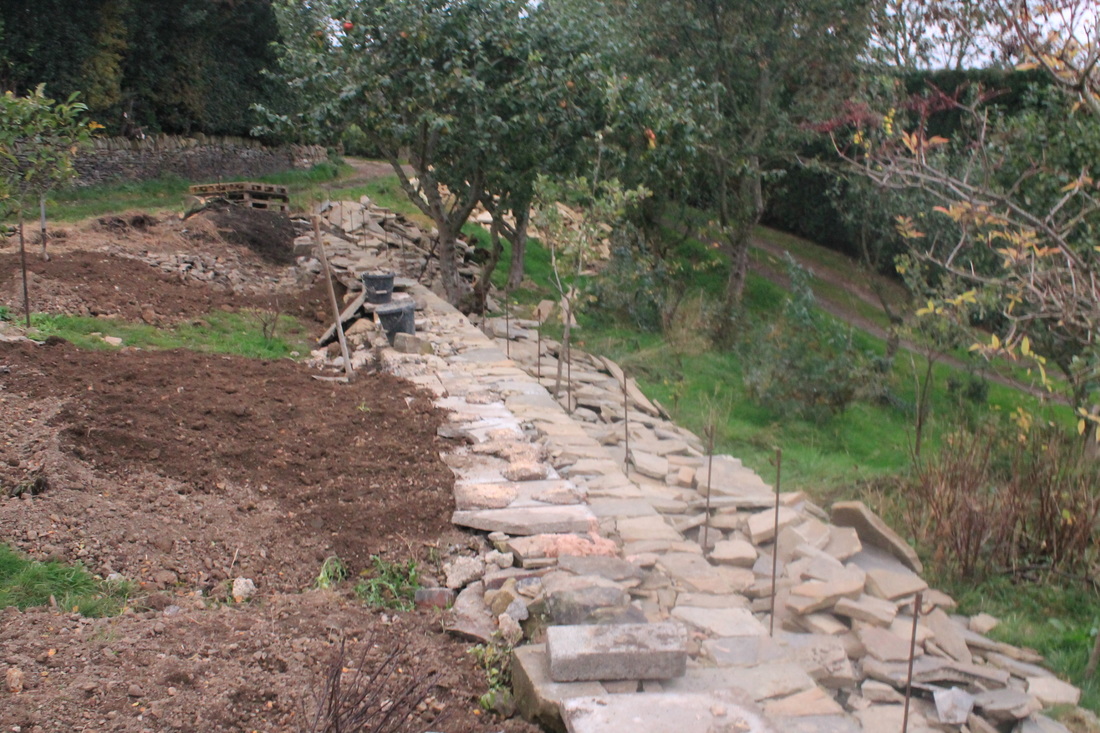
Last year we began the process of transforming a steep orchard area of apple trees and fruit bushes into a series of stepped terraces. This involved bringing in around 60 tonnes of stone thus far and the tallest of the terrace walls is complete. To flatten the area tonnes and tonnes of soil had to be brought in behind the wall as it went up. Now the area is flattened we have begun planting up the new bed. New fruit bushes have also been planted at the base of the wall.
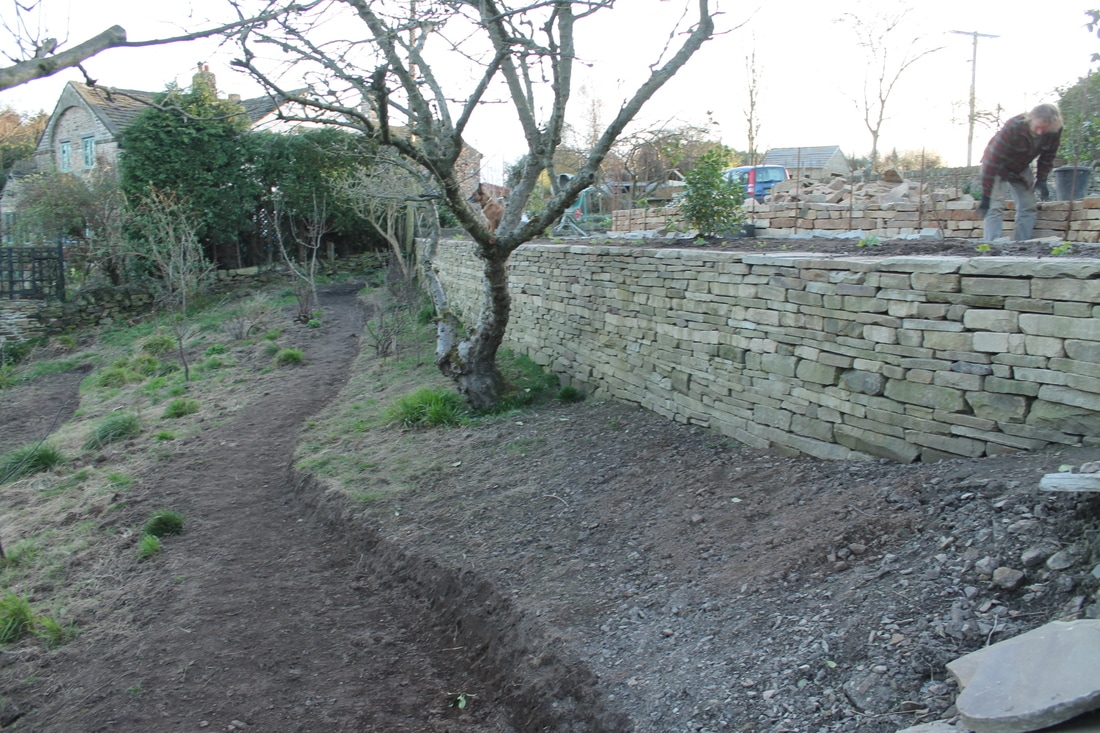
Here is the completed wall, holding the tonnes of soil forming the upper terrace. We have also excavated some paths in the earth of the lower bank that will be a network of grass paths once the grass seeds germinate. Smaller walls are planned further down the bank to create a stepped terrace landscape.
Behind the terrace wall is a planting bed which will have a gravel path running alongside it edged with stone bricks. This will lead to the large slab staircase we already built. We are now working on a large curving wall that partly retains another level of ground that will be a hard standing area.
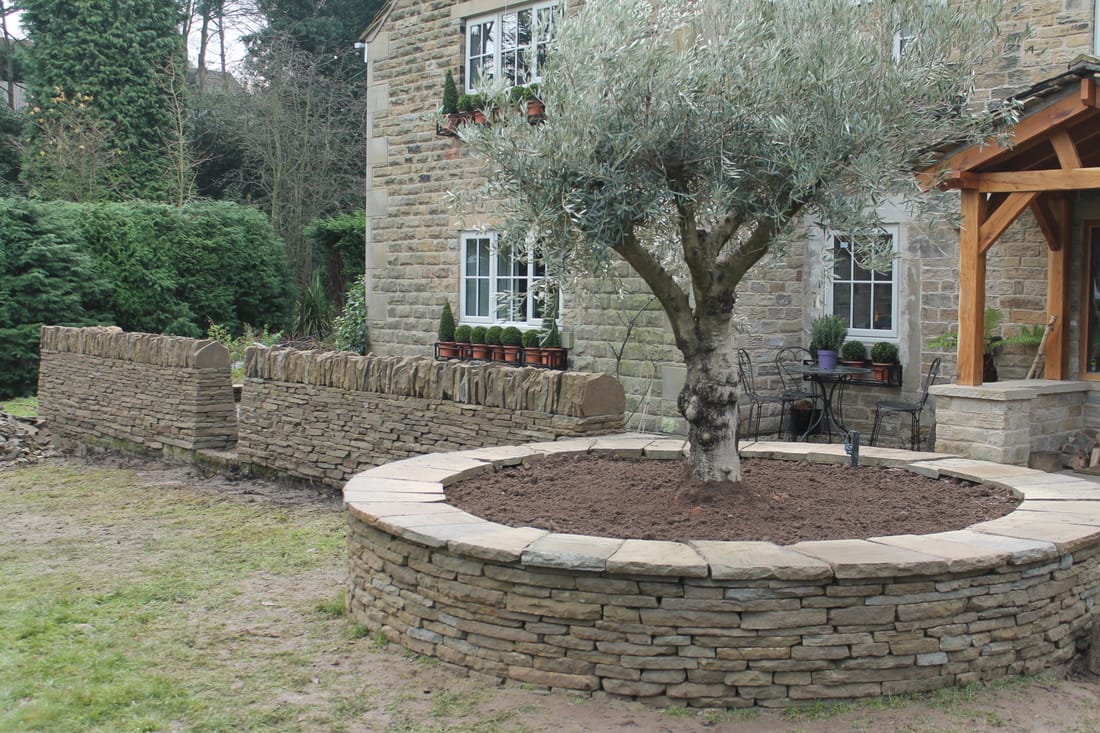
Before Christmas we worked on a rural village garden in idyllic setting with a small stream running through it. It was nice working to the sound of running water. The job involved bringing in 20 tonnes of quarried stone to build one large planter 4 metre in diameter around an olive tree and an adjacent wall with a three cheek ends. The olive was apparently brought in containerised from Spain.
The copes (i.e. the top stones) of the circular planter are flat with and at the right height to serve as a seating area. These copers required quite a bit of working in order to get an inner and outer curved edge but it is a nice clean effect overall. The wall itself kept the regional West-Riding style of coping which had to be chiselled to shape.
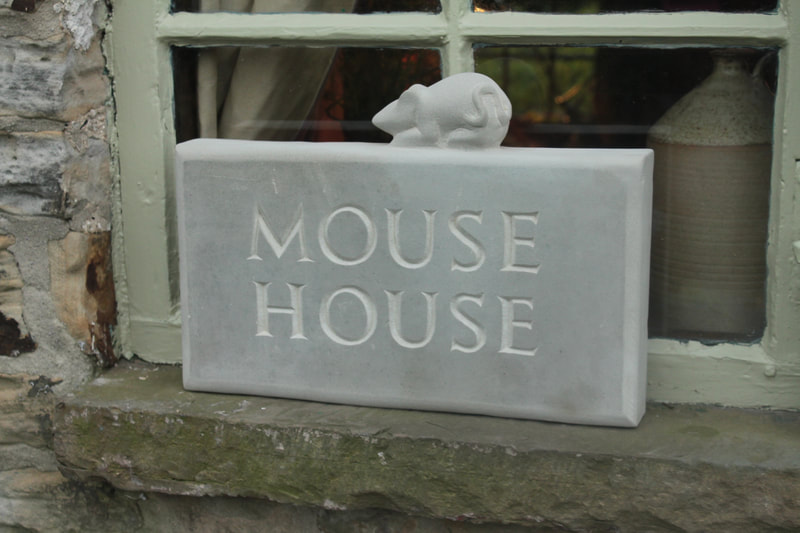 "Mouse House" ornamental hand carved stone house sign
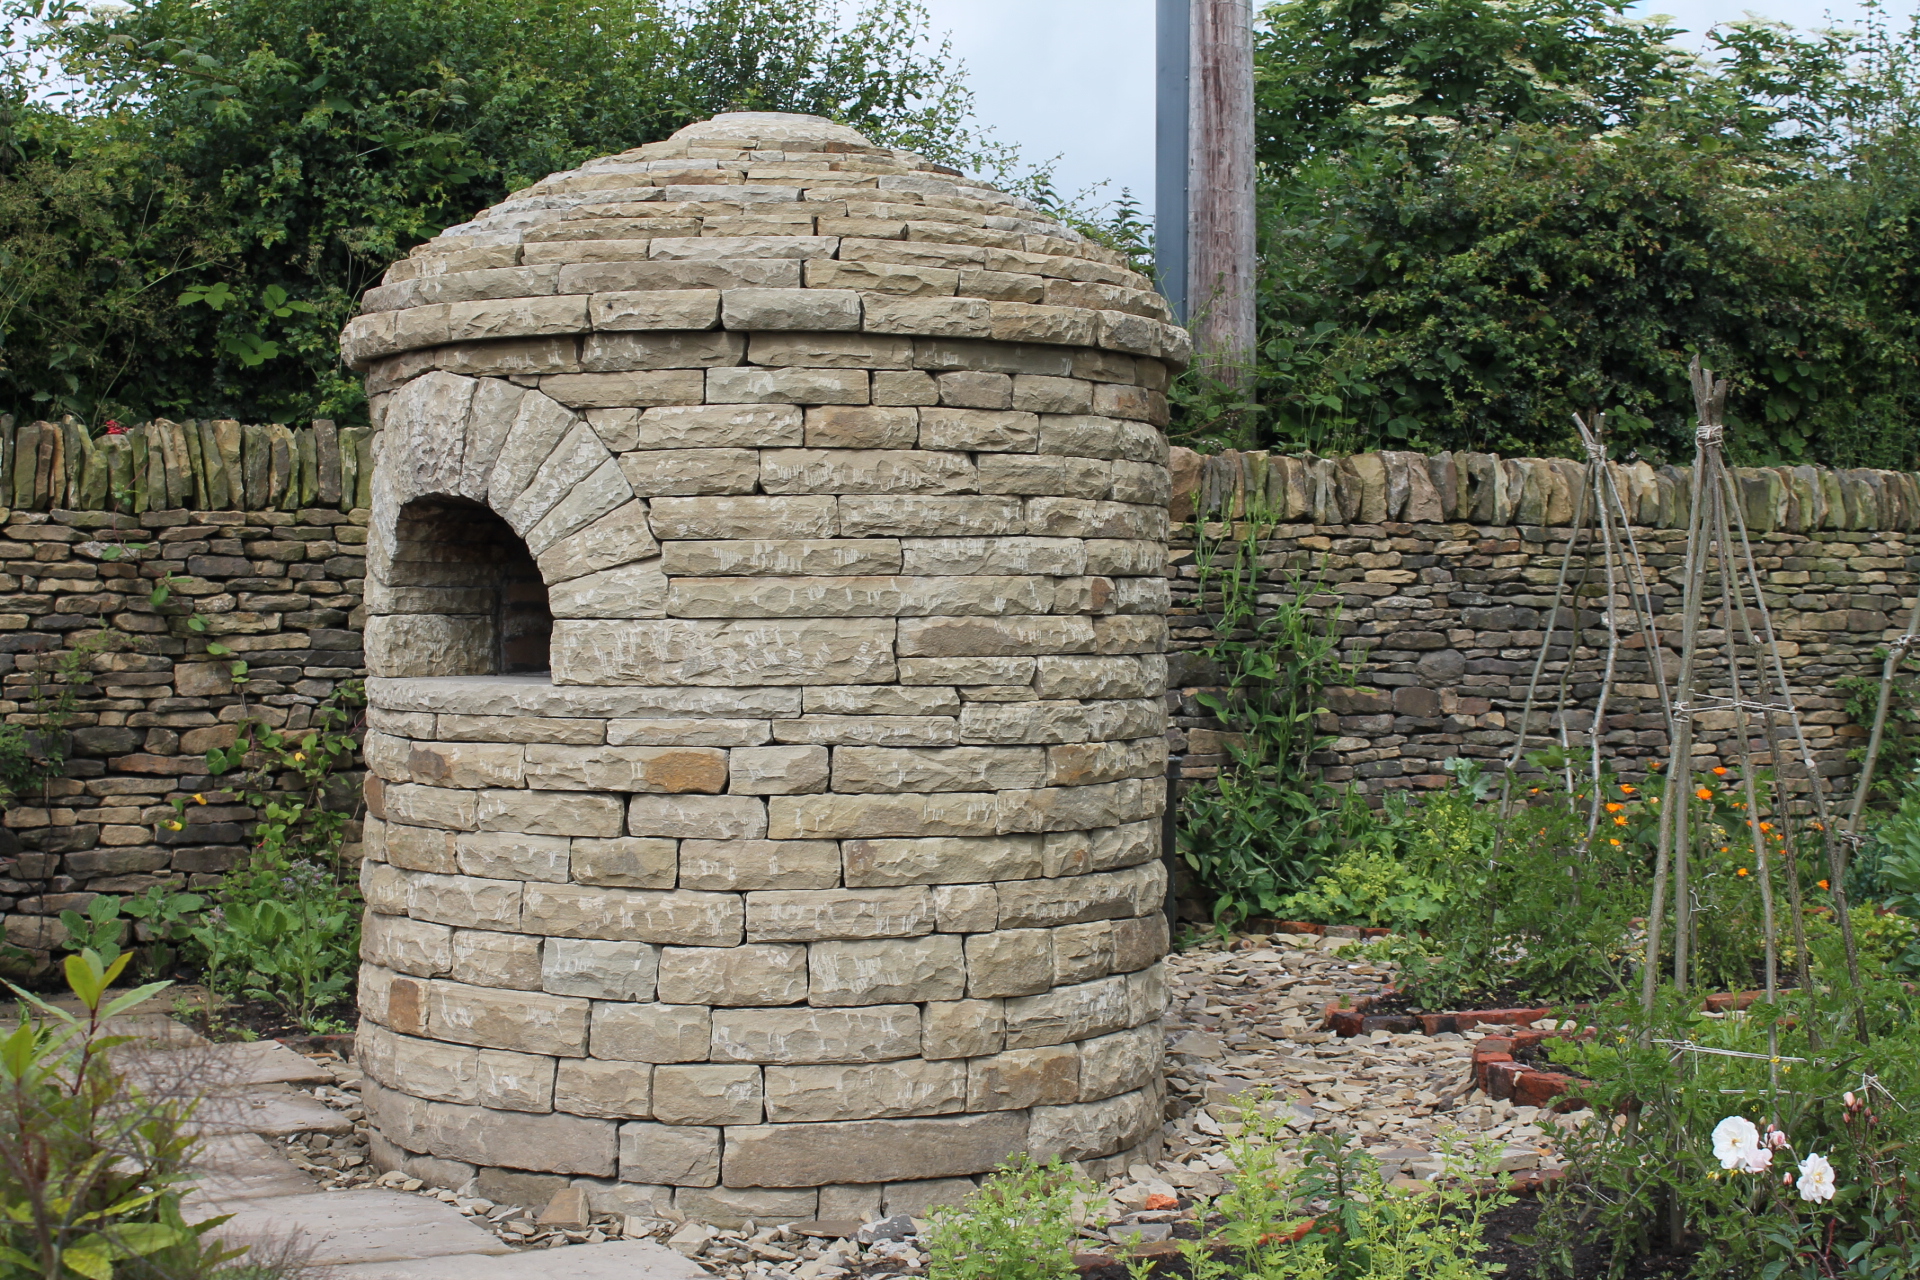
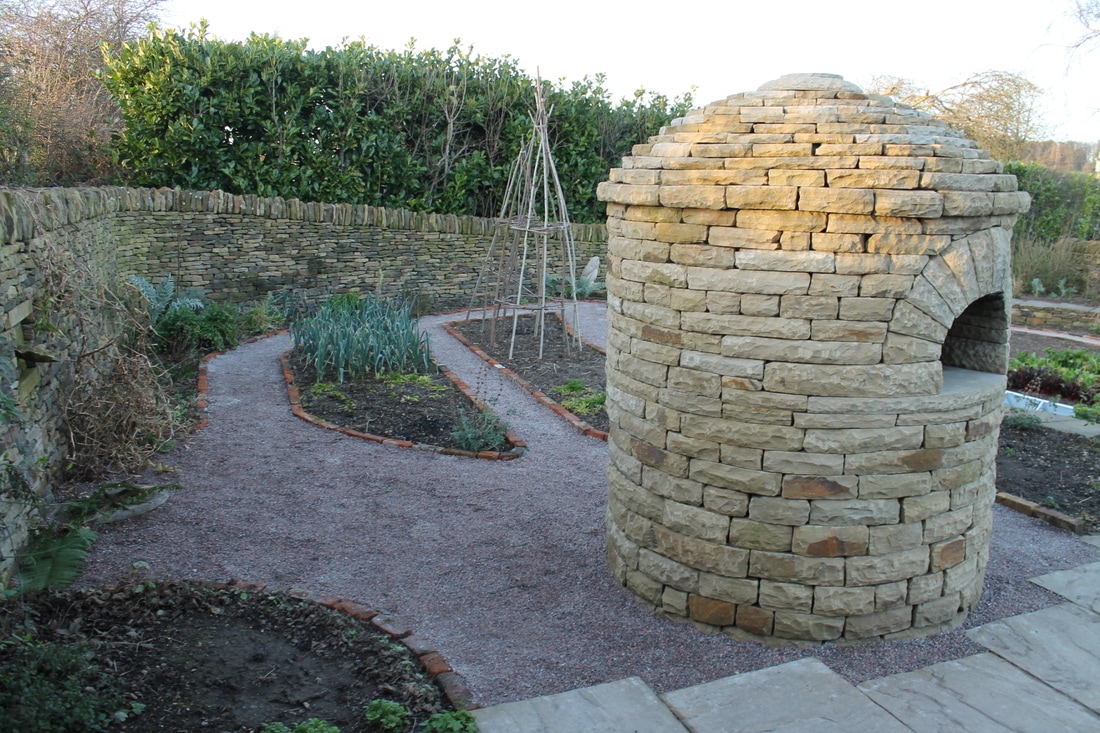
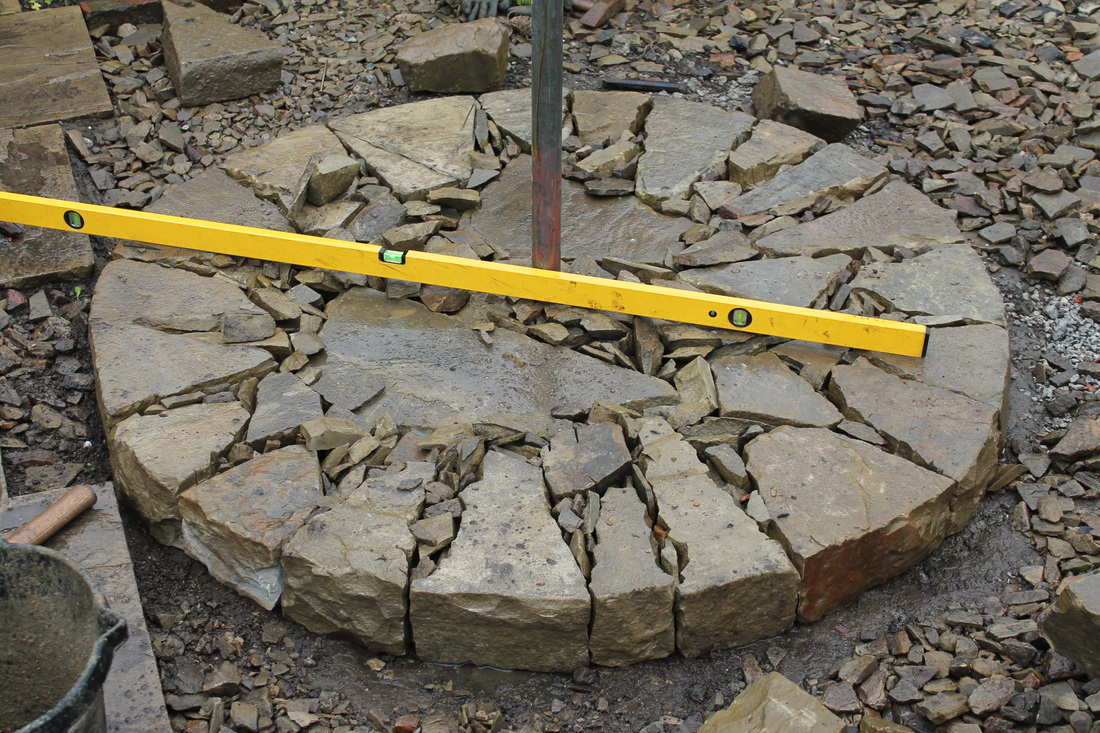
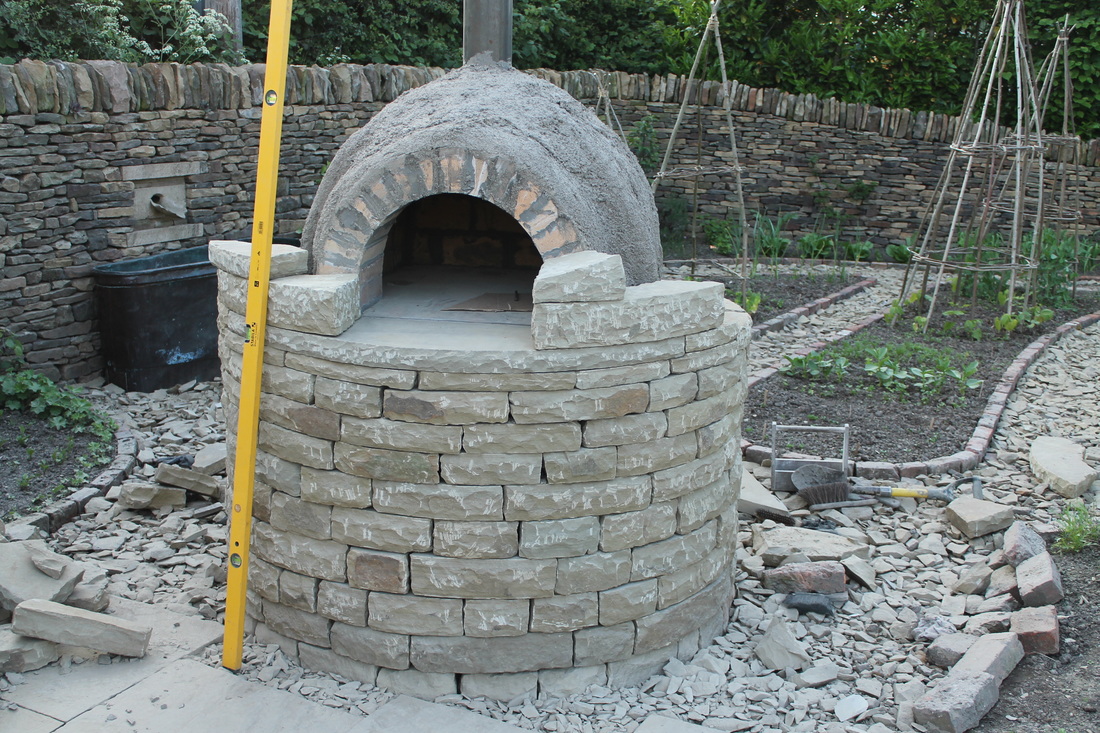
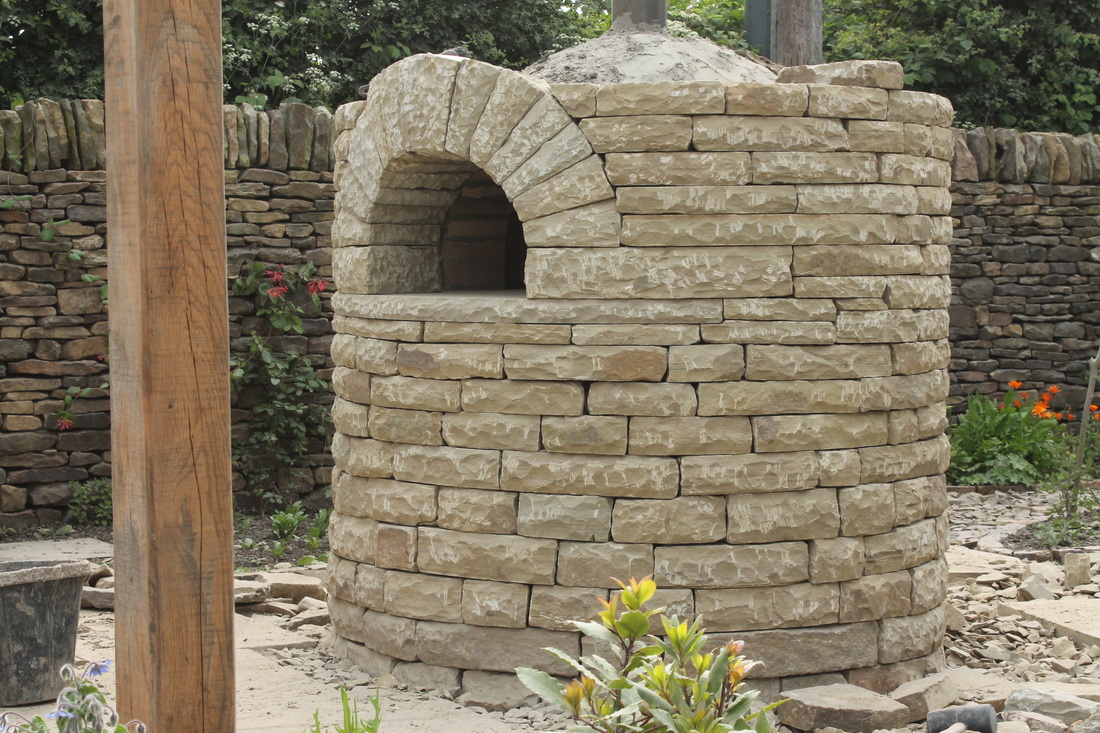
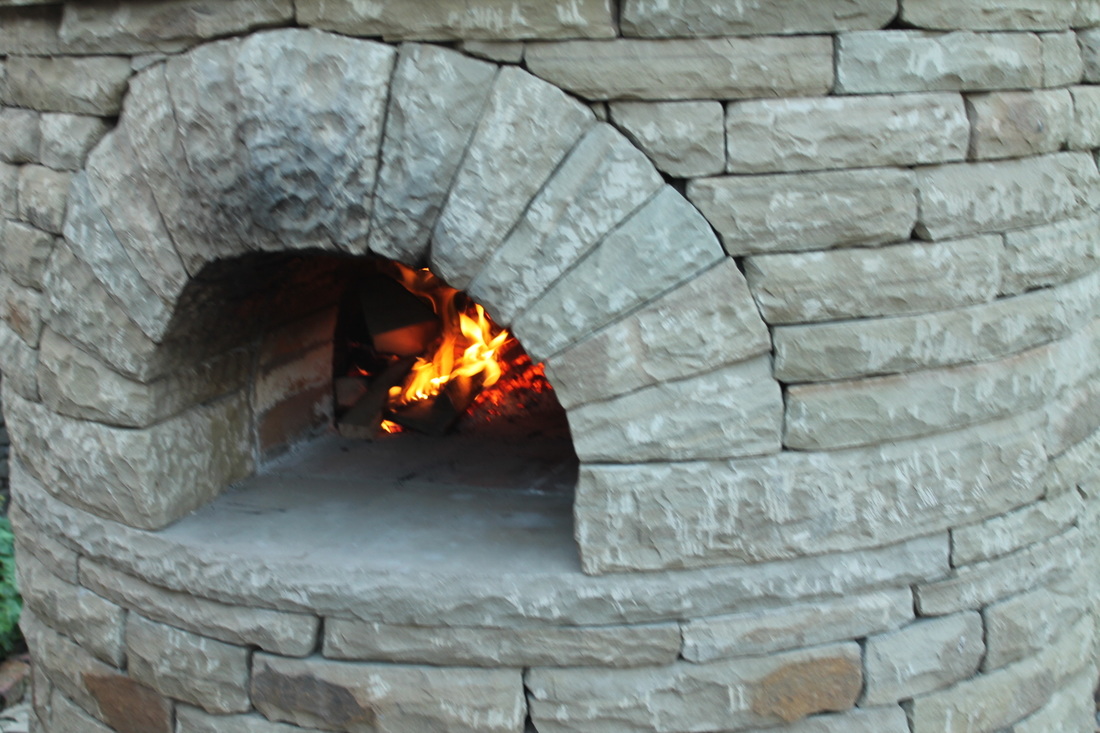
Building the stone pizza oven During the summer of this year, we built a stone wood-fired pizza oven. It was entirely of our own design and we wanted it to have a traditional rustic character with a nod to traditional features and yet also feel contemporary in appearance. The external stone structure encapsulates a refectory brick oven, built with heat resistant mortar, to cope with the high heat of the wood fired oven. The stone is cylindrical and it formed such a tight curve that each stone block needed to have it face chiselled to the right curvature as well as having its sides tapered. However, the extra effort was worth it as the circles and curves complement each other, the curve of the arch over the oven mouth and the domed corbelled roof are reflected by the curved shape of the body of the oven. The archway had to be built across the curve of the oven, which took a lot of skill to achieve. The arch is very tight and we managed to find a nice long stone to chisel into a lintel for below the arch. Having two large jumper stones to form the base on each side of the arch added a nice symmetry. The stone was handpicked by us from a Yorkshire quarry and it is an extremely hard sandstone. One of the nice things about using a local natural product like this is the naturally occurring patterns and colour variations that create pleasing character rather than being uniform. We also took a lot of effort to 'grade' the stone into courses so that the larger stones are toward the bottom and the size of the stones diminish in height further up until we reached the slate-like pieces for the top of the corbel. As well as good practice, this helps the masonry to look right on the eye. The roof curves in on the top of the chimney pipe of the oven and the smoke rises out of the hole in the top. We had to carve a domed stone finial for the top to hold down the top course of stone slates with a hole in the centre to let out the smoke. Finally, we made a thin circular piece of stone to sit on top of the finial to keep out the rain when the oven isn't being used, which was more visually pleasing than a metal chimney cowl. It was surprising in the end just how much stone was required for a feature like this. The entire base up to the chimney opening is solid dry stone with the centre filled in with larger stones which are then packed tightly around with the offcut stone chips that chiselling produces. Overall, it is a dense structure but it ought to be around for a long time to come.
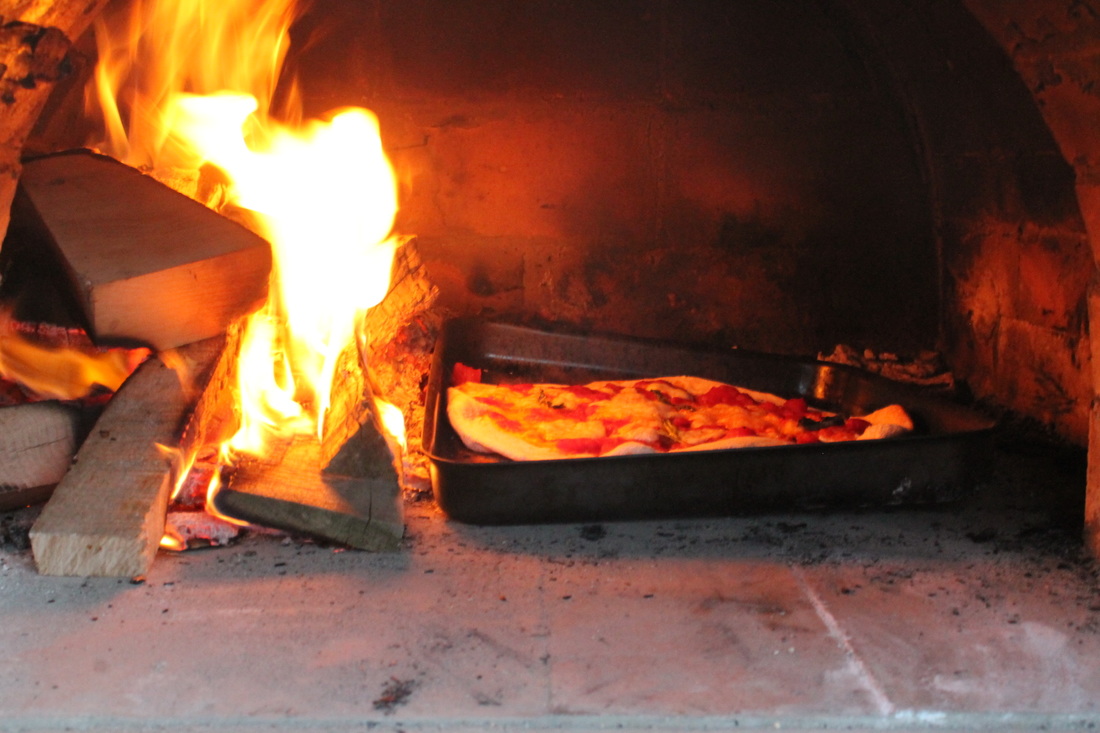
Using the stone pizza oven Since the construction of the oven we have used it to make pizzas several times already during the summer. We first had to light a fire just to 'proof' the oven. Then on a dry day we tried making pizzas, which it turns out is quite an art form. It does take a while to get the oven up to a high temperature and the type and dryness of the wood is important in this. Once to temperature, however, a large number of pizzas can be produced.
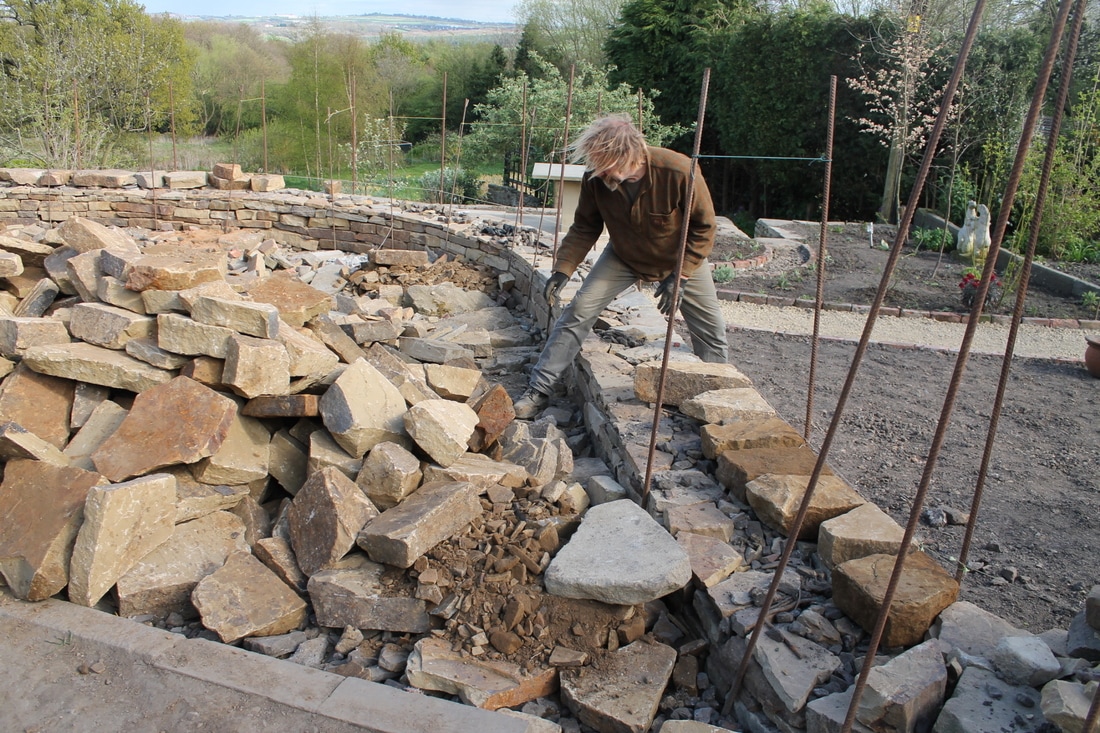
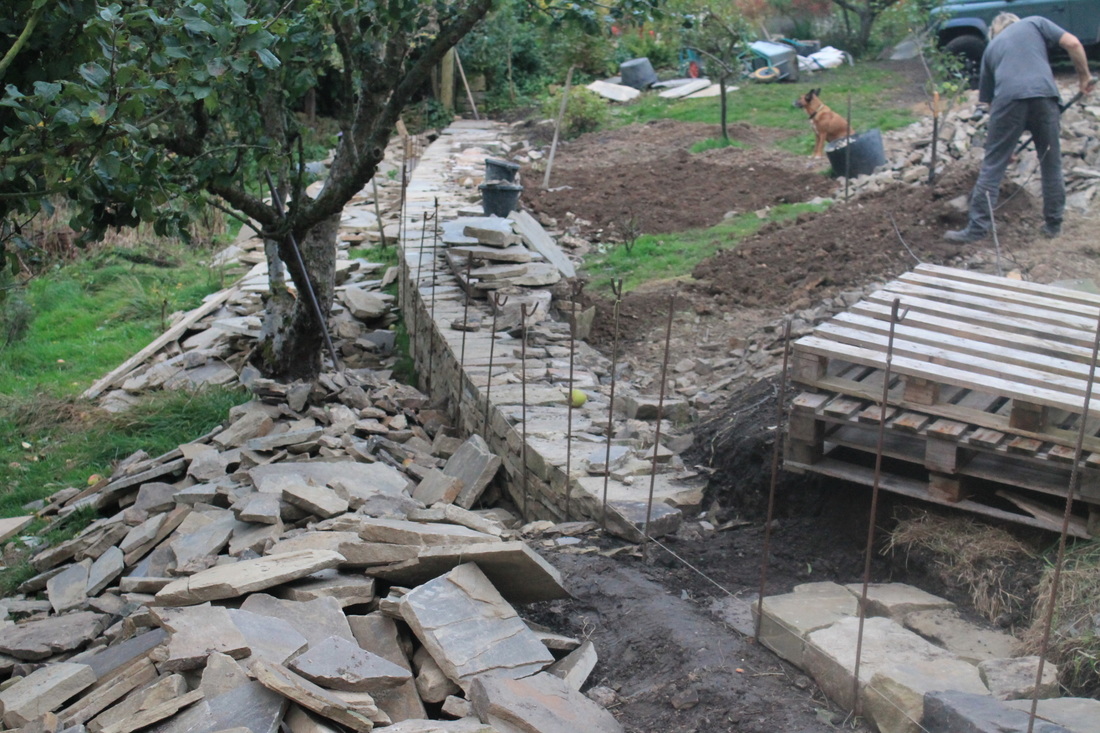
On an area of sloping ground where there is a small orchard we are building curving stone walls to form flat terraces. As we build the new retaining wall, we will then infill behind it with tonnes of soil in order to form the new level and turn sloping ground into a flat garden area. Dry stone is the perfect way to do this as it is so free draining, there is no mortar or concrete to stop the drainage of water. In order to hold such a large amount of soil, the wall is very thick and has a considerable backing of large stones. Soil is being riddled and brought in slowly via tractor allowing us to build up courses of the retaining wall as soil is filled in behind it which helps to stabilise the wall. We will also have to move some small fruit trees and bushes as the dormant season approaches; often in landscaping there will be some temporary disruption in order to do something new.
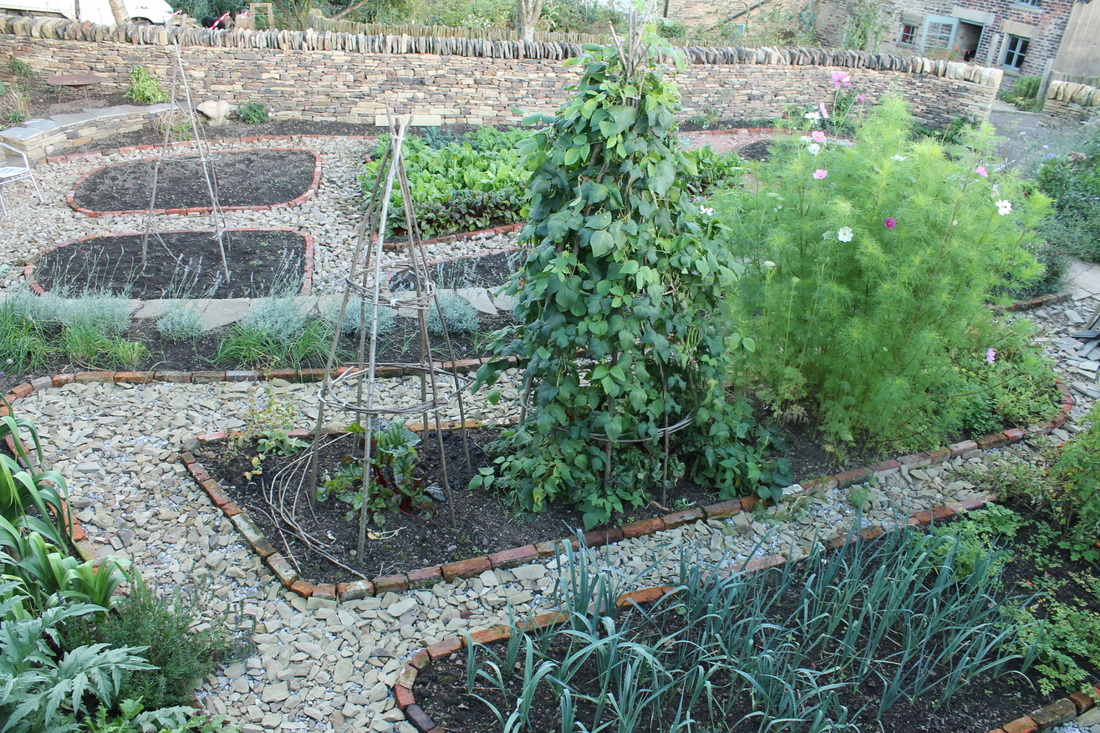
We have continued making progress on the walled garden, our take on the productive feature of many old estates.
Part of the design for the stone walled garden includes two stone structures in the corner of the garden. We completed a stone pizza oven earlier in the year and we have also completed the exterior of a stone building that is a garden room or summer house. Once the interior is fitted out, it will be a great space for enjoying the garden in the summer months. The garden room sits on the blueprint of an older lime mortared brick and stone building, however we wanted a dry stone appearance to compliment the surrounding dry stone walls. We opted to use a flat very evenly bedded Yorkshire sandstone which would give the stonework on the building very tight and less rustic in character than a dry stone wall. We also constructed a timber roof frame using local oak and tiled it from large flat pieces of Yorkshire sandstone which we shaped into sandstone roofing tiles. This seemed the most appropriate thing to do rather than simply using slate as sandstone tiles are much more traditional to this area and we wanted to create a new building that, although had some modern features would also completely sit at home within its historical environment. 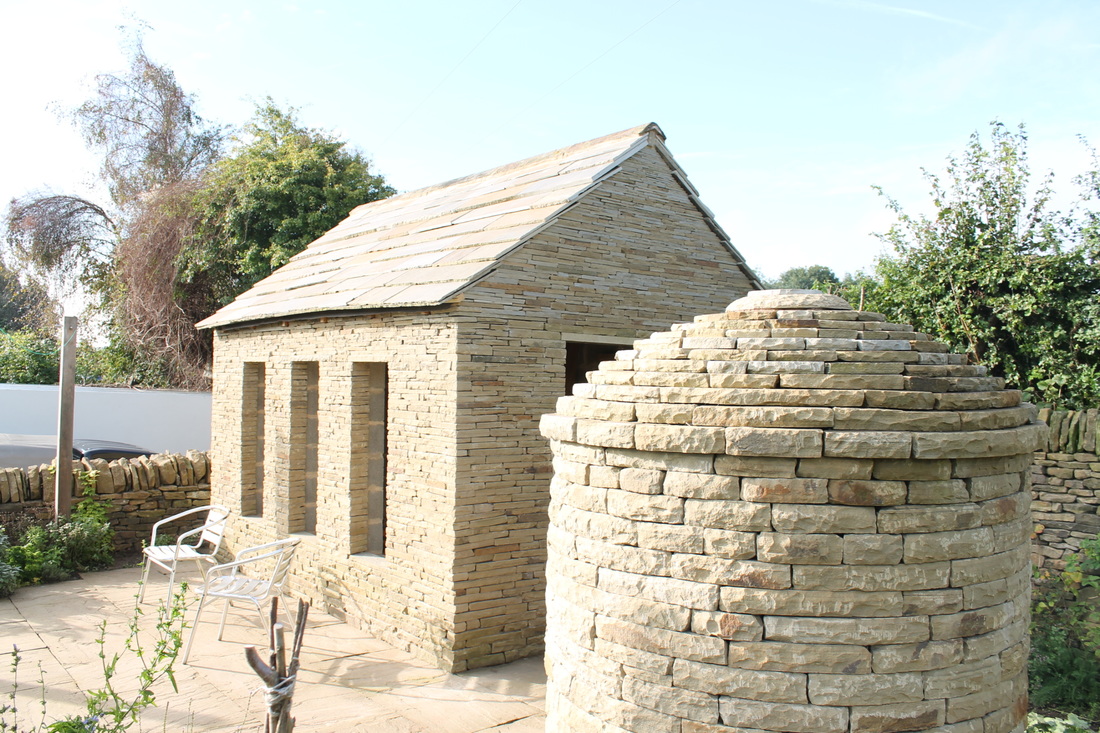 stone shed and pizza oven in the foreground
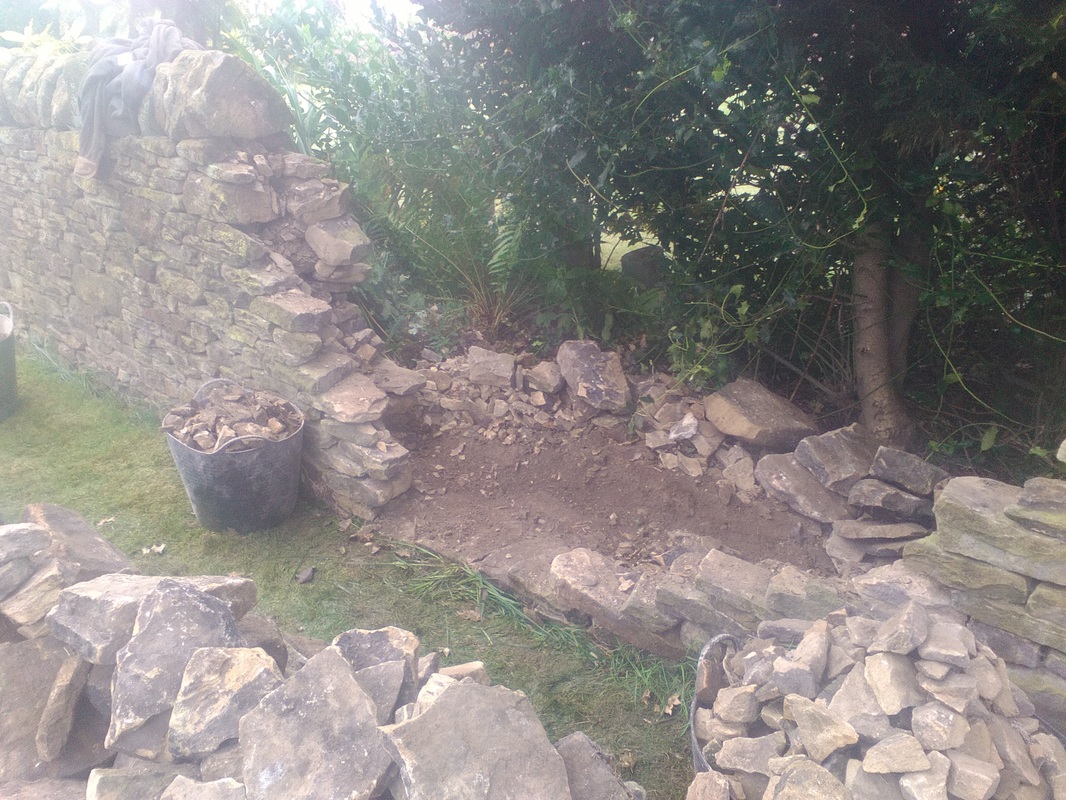
A recent repair of a tumbled down section of dry stone walling is a good reminder of how important it is to have a strong structure to a dry stone wall. Aside from sound foundations and correct wall batter, or pitch, a common problem to encounter with fallen sections is that the stones are mostly laid "length on" like bricks rather than placed into the wall for greater strength. This means that in the middle of the wall a larger space is left having to be filled in with more stone rubble infill known as hearting or packing. When the wall is mostly hearting through the centre and there are also no longer stones, called 'through' stones or tuskers, placed right the way through, the wall will not stay up long. This is because there is nothing tying the two outer skins of the wall together and it is mostly relying on the action of gravity from the wall batter. Building in this way is not good practice and can be called 'trace walling', however there can also be other reasons. The waller could have only had access to smaller pieces of stone and was making do with the materials to hand or perhaps had limited stone and was making the outer stone go further and using more infill. It may also be that appearance had been prioritised over strength as the longer 'faces' of the stone can give a more regular masonry appearance. A wall can appear well put together on the surface, but not be strongly built. This means that when a wall comes down and the original has been built in a 'trace walling' way, in order to strengthen it you can expect to have to bring in quite a bit of extra stone. The original wall will not be a dense structure and once you start turning the stones inwards this means that you will be making the wall more dense, meaning you'll ultimately need more stone. Also. if there are few or no 'through' stones, then you'll need to bring these crucial stones in as well. The waller is always on the look out for 'throughs', which are laid in several alternate bands in the wall and are very important in holding it all together.
|
Author
Richard Meller Archives
May 2017
Categories
All
|


 RSS Feed